
In Part 2, we did the Keycloak Setup and created a realm, an identity provider (Domino LDAP), the Domino Service Provider information on Domino and exported the Service Provider XML, we did a set up for the nomad-config.yml on Domino and created the Service Provider on Keycloak by importing the Domino Service Provider XML and modifying it as needed. We then started Nomad and made sure, all switches fall into place.
Now, the only "Annoyance" in this process is the prompt of the Password of the Notes ID when we set up Nomad Web. Let's eliminate this as well as follows:
Nomad Web ID Vault SAML Configuration
There's one critical step in the setup process for HCL Nomad Web - this is the handling of the respective Notes ID of the user. As Notes has had a 2FA long before somebody knew the acronym, the ID File is the 2nd Authentication Factor, containing the necessary keys to make sure that your identity is validated by the Domino Server.The ID needs to be in the ID Vault and is downloaded from the vault in a secure transaction during the Setup Process of a Notes Client, or, in our case, HCL Nomad Web. The id file is securely stored into the browsers filesystem which is sandboxed so you can't extract the ID file from there. When you clear the browser cache, the id is removed as well.
The process of unlocking the id for usage in the vault requires a separate authentication process, this is also true for SAML Web Authentication against Domino as soon as you are working with features like Document Signing or encryption - this also requires access to the id file in the vault and in that stage a 2nd trust relationship between Domino and the IDP. So basically the same mechanism also applies for HCL Nomad Web.
So if you have SAML SSO configured for Web Access to Domino (e.g for iNotes or Verse or XPages Apps) and HCL Nomad Web, you will end up with 4 IDPCat Entries for a single Domino Server and 4 Client Definitions on Keycloak.
As we are only looking at the HCL Nomad Web configuration today, we thankfully only will have to deal with a 2:2 relationship between Domino and Keycloak. One of them os already established, so in this part, we will only have to add one more IDP Cat Entry and one more client definition. BUT - as Nomad Federated Login is concerned, this also affects settings in the Security Policy Settings for the IDVault and in the IDVault Config itself.
Step 1: Set up the IDP Catalog Document
This time, the configuration is mostly straight forward, but the devil is in the details. Let's start by creating a new IDP Catalog entry and by importing our SAML 2.0 XML Definitions from Keycloak (see Part 2 of this series on how to obtain this). Import the Keycloak XML file - then let's define our hostame.
To do this, we will have to obey some conventions. A nomad vault configuration identifier or hostname HAS to look like this:
nomad.vault.<dns name of the nomad web server> as my DNS Name for Nomad Web nomad.sit.de this leads to the weired notation you find below:
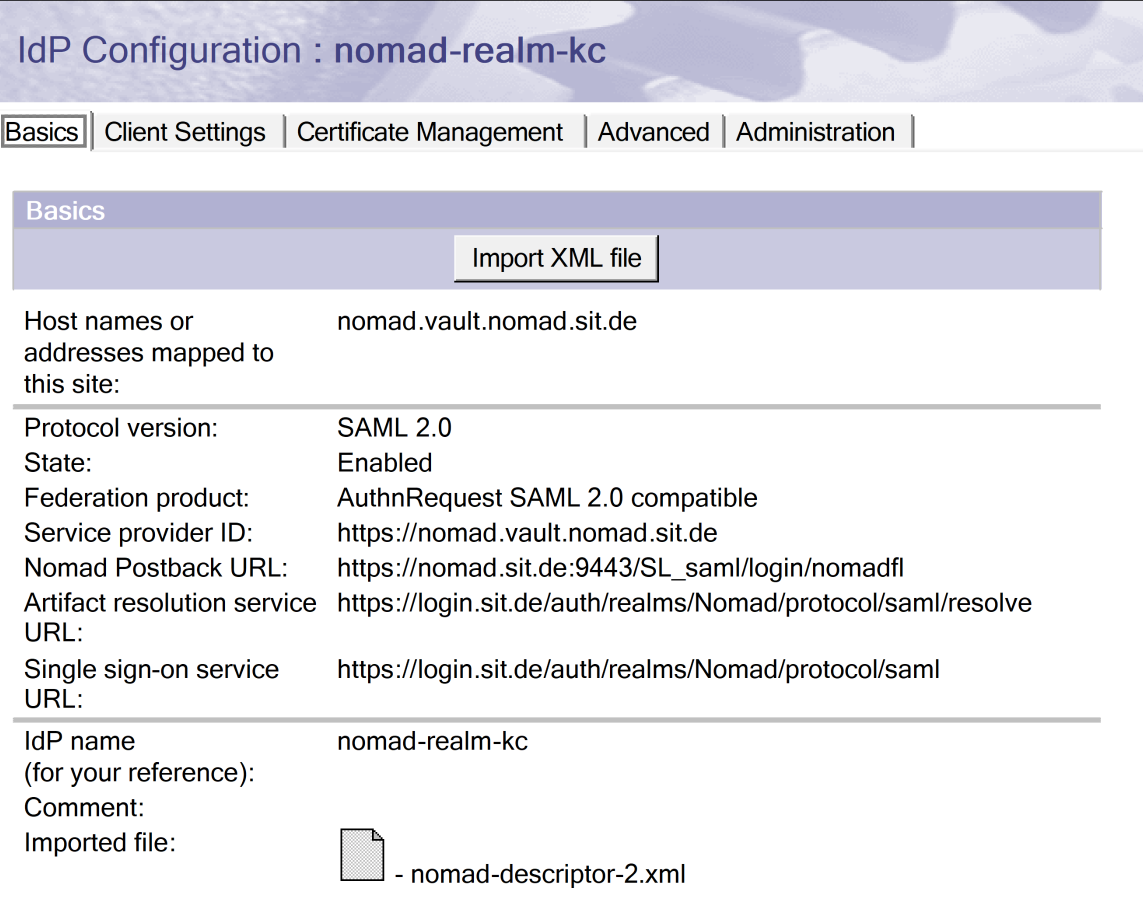
The service provider ID is the same notation as the host name plus https://
The nomad postback url field will pop up after the first attempt to save to document. You can copy this value from the existing IDPCat Document for the Web Auth part. All other fields on this page should be pre-set by the XML Import. Please add a descriptive IDP Name and save the document before heading on to the next tab.
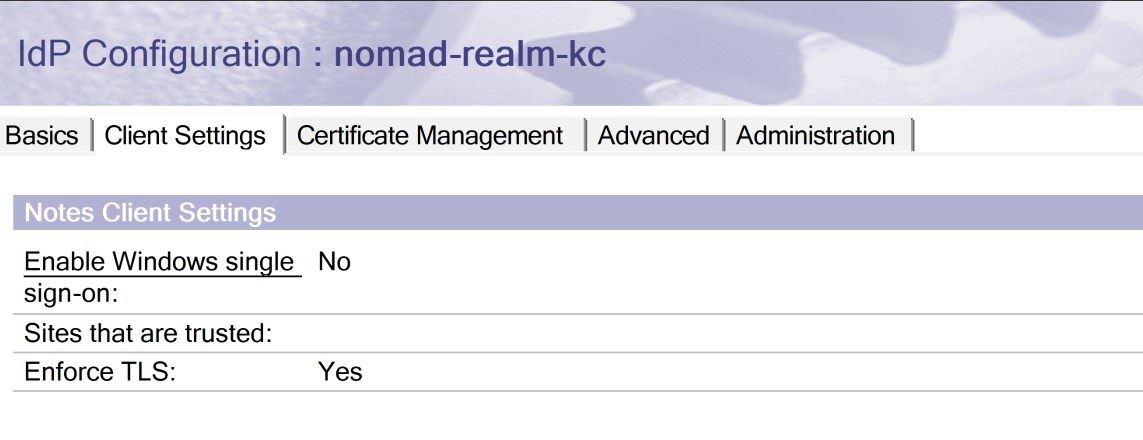
On this page, we set Windows Single Sign on to "No". On the next page, we have to define the Domino URL (points to the DNS Name of the Nomad Web Server without the port information). The Logout field gets populated by the XML import. Now, Create the SP XML and add a unique Company Name.
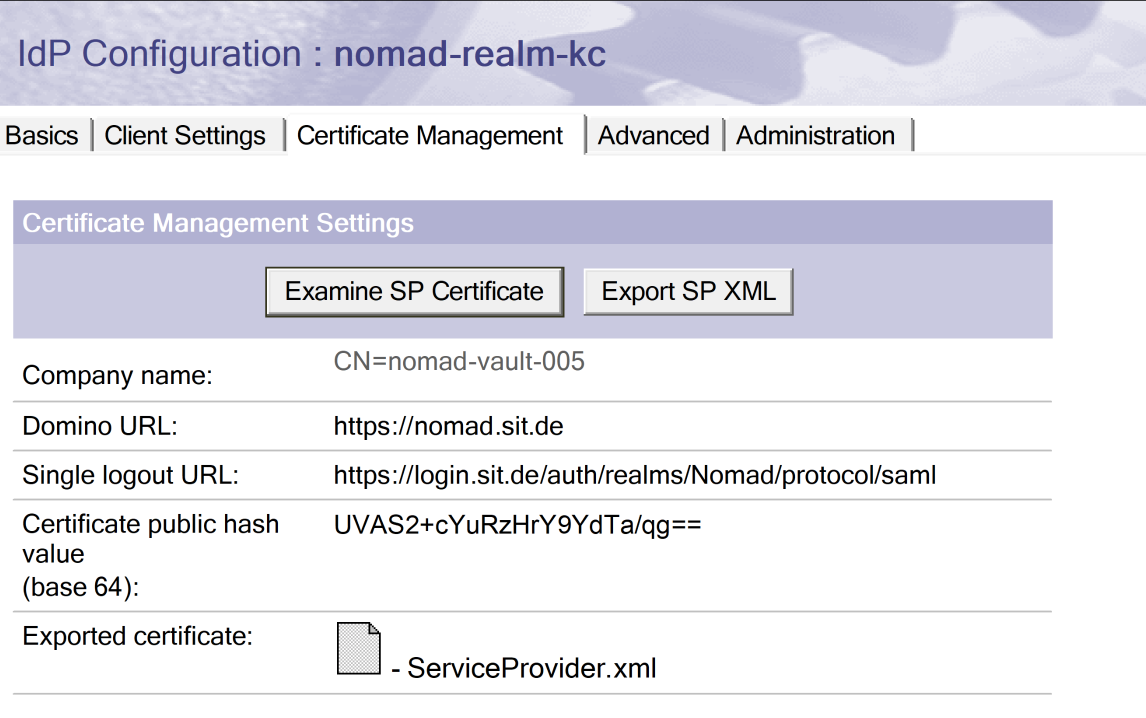
Edit the document again, add the Domino URL and save the document and export the resulting ServiceProvider.xml for import into Keycloak later on. Leave all other settings as is.
Step 2: Set up the Keycloak Client
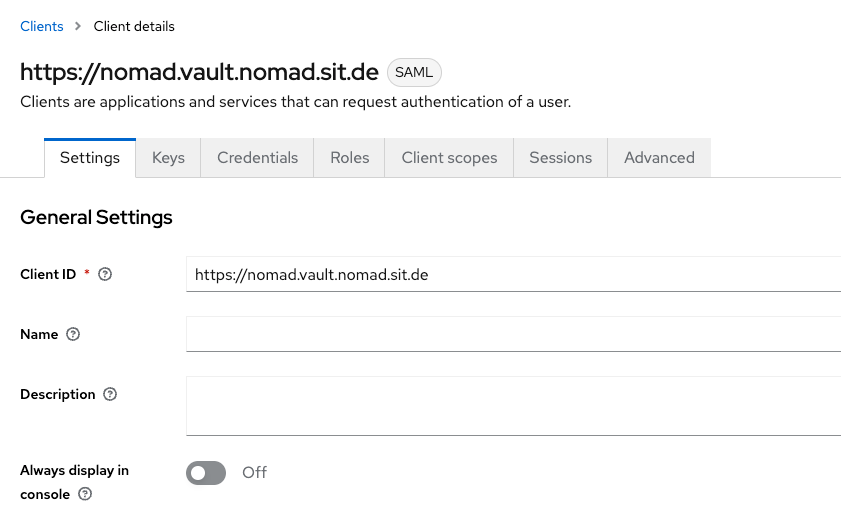
Now, we will do the import of the Service Provider in Keycloak. Therefor, log in to your Keycloak Admin console, switch to your Realm used for the Nomad configurations and import a new client (see part 2 of this series on this process). Then, edit the newly created the client. Here are the General Settings:
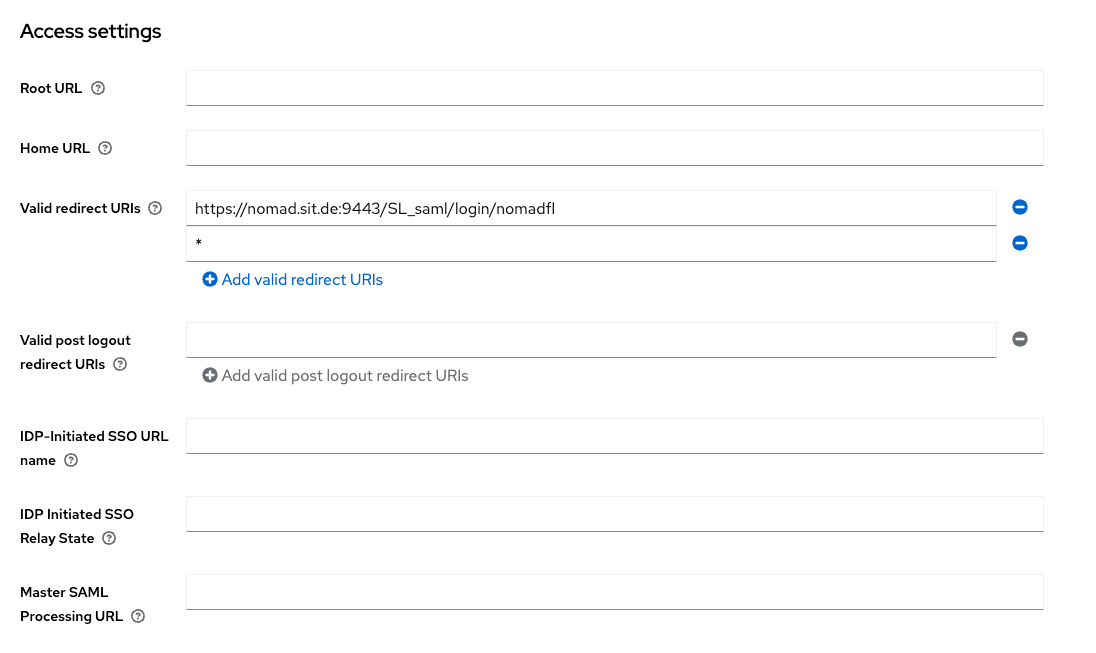
These are the Access Settings, I add a "*" to the valid redirect URLs - this can be removed after testing.
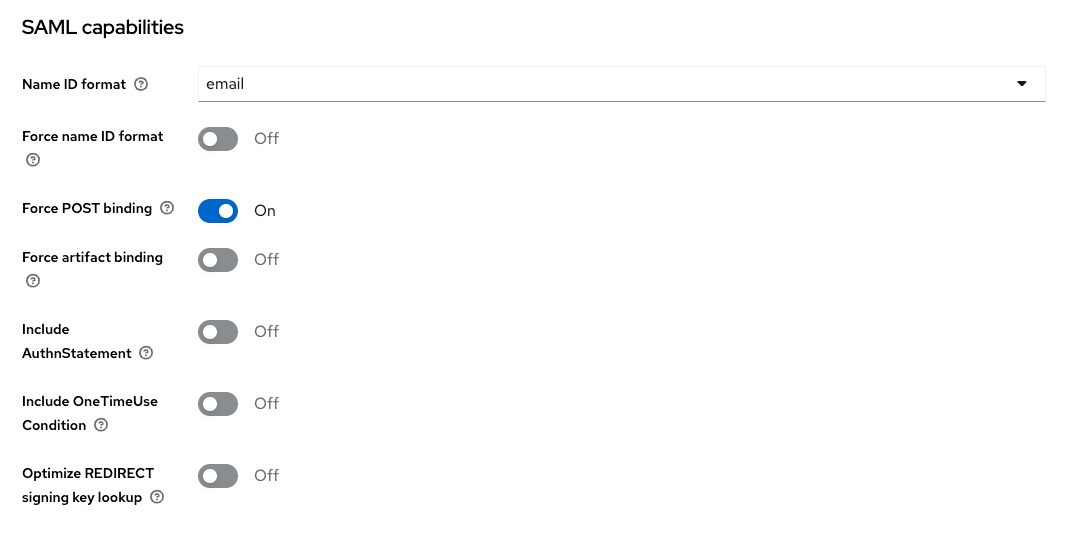
Next up are the SAML Capabilities Settings. Here, we switch the Name ID Format to email.
Next up are the sections for Signature and Encryption - switch on "Sign documents" and switch off "Sign assertations". Define the signature algorithm and the signature key and the key name and the canonicalization method as shown below.
For reference the login and logout settings, which are left unchanged. Save your changes !
TIPP! Make sure to save every change on the respective tab - changes are lost, if you don't save them and switch to a different tab, even if you save the changes there!

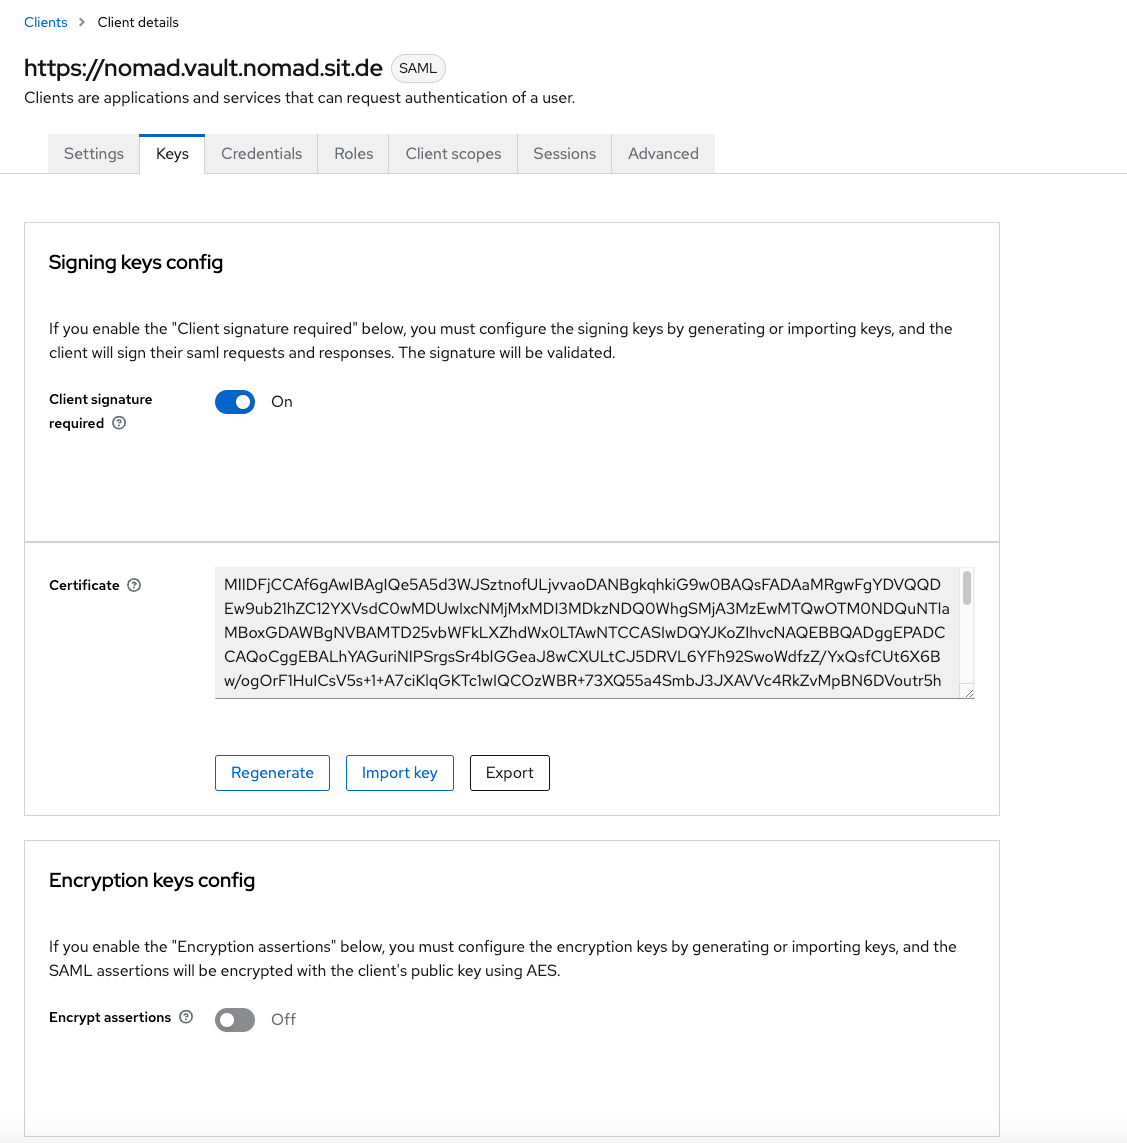
Now let's switch to the "Keys" tab. Leave the Client signature required option to "On" and switch off the Encrypt assertations option. Save your changes.
We will leave the next four tabs unchanged:

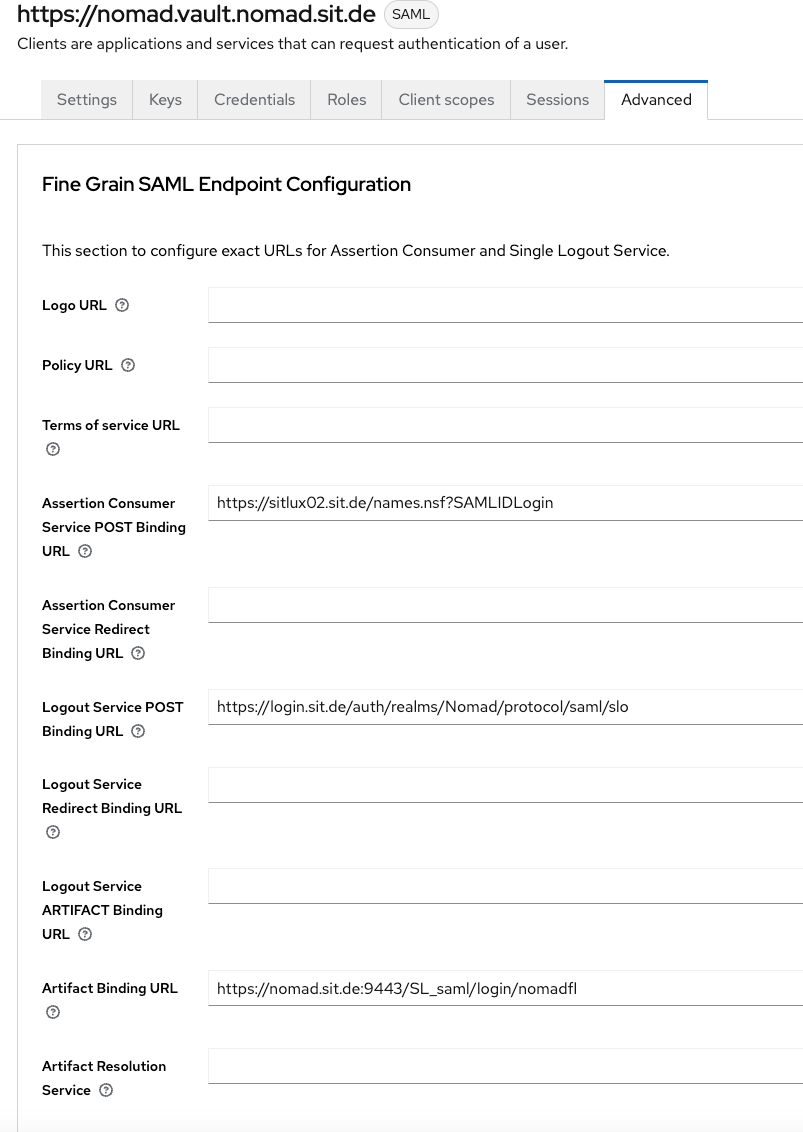
Let's finally switch to the Advanced tab. Here's an important change to do to make this round trip between Domino and Keycloak work. In the Fine Grain SAML Endpoint Configuration Section, alter the Assertation Consumer Service POST Bindung URL to the url of your HCL Domino Servers DNS Name like so:
https://<your HCL Domino Web Server DNS>/names.nsf?SAMLIDLogin
Leave all other items unchanged and save your changes.
This concludes the Keycloak part.
Step 3: Alter ID Vault configuration
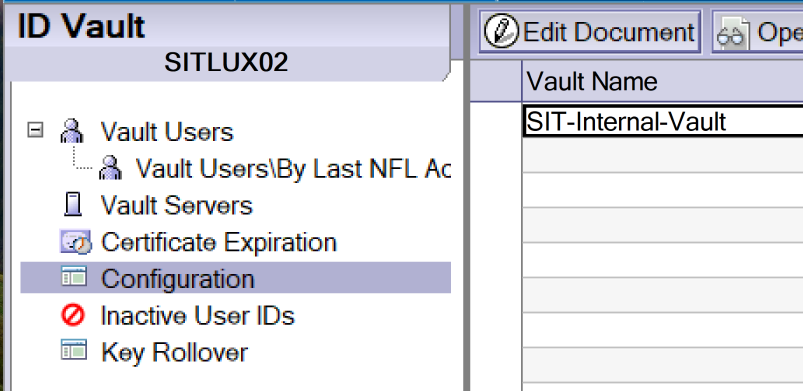
Now, we need to alter the ID Vault Configuration to adapt our changes. open your ID Vault in the Notes Client and navigate to "Configuration":
Edit the configuration document and add the nomad.vault configuration from the idpcat to the Nomad Federated login approved IDP configurations field:

I also add my ID Vault Servers to the Trusted Servers field:

Save your changes. This concludes the ID Vault Settings.
Step 4: Alter Security Policy Settings
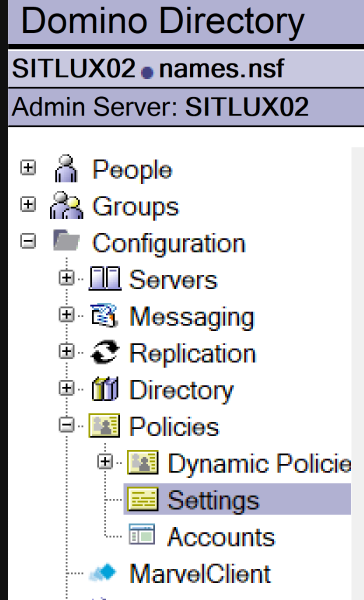
In the Domino Directory, switch to Configuration -> Policies -> Settings
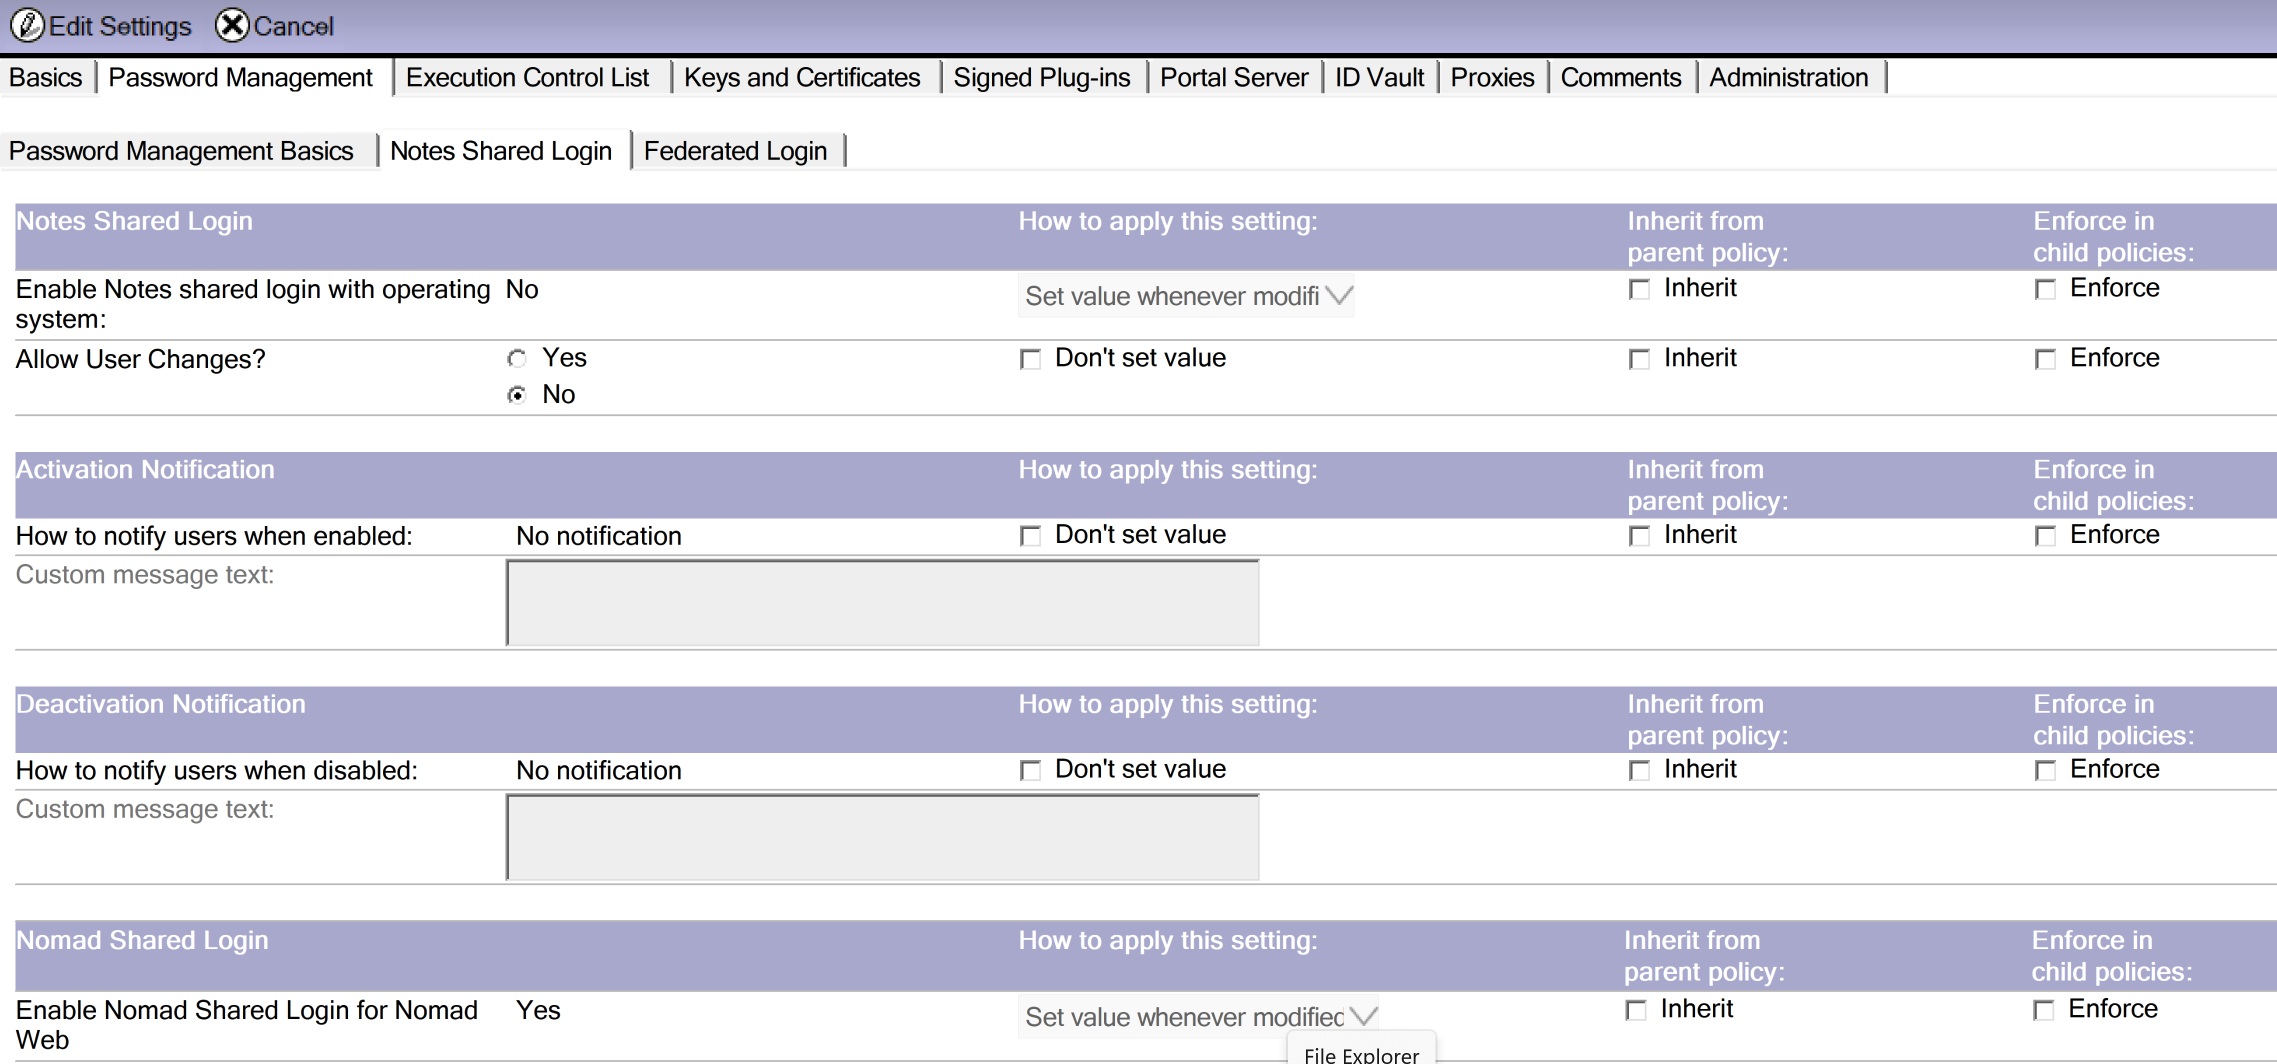
Then, edit your ID Vault Policy Settings document. In there, switch to "Password Management" -> "Notes Shared Login" and Enable Nomad Shared Login:
Then, switch to the Federated Login tab and set the following parameters:

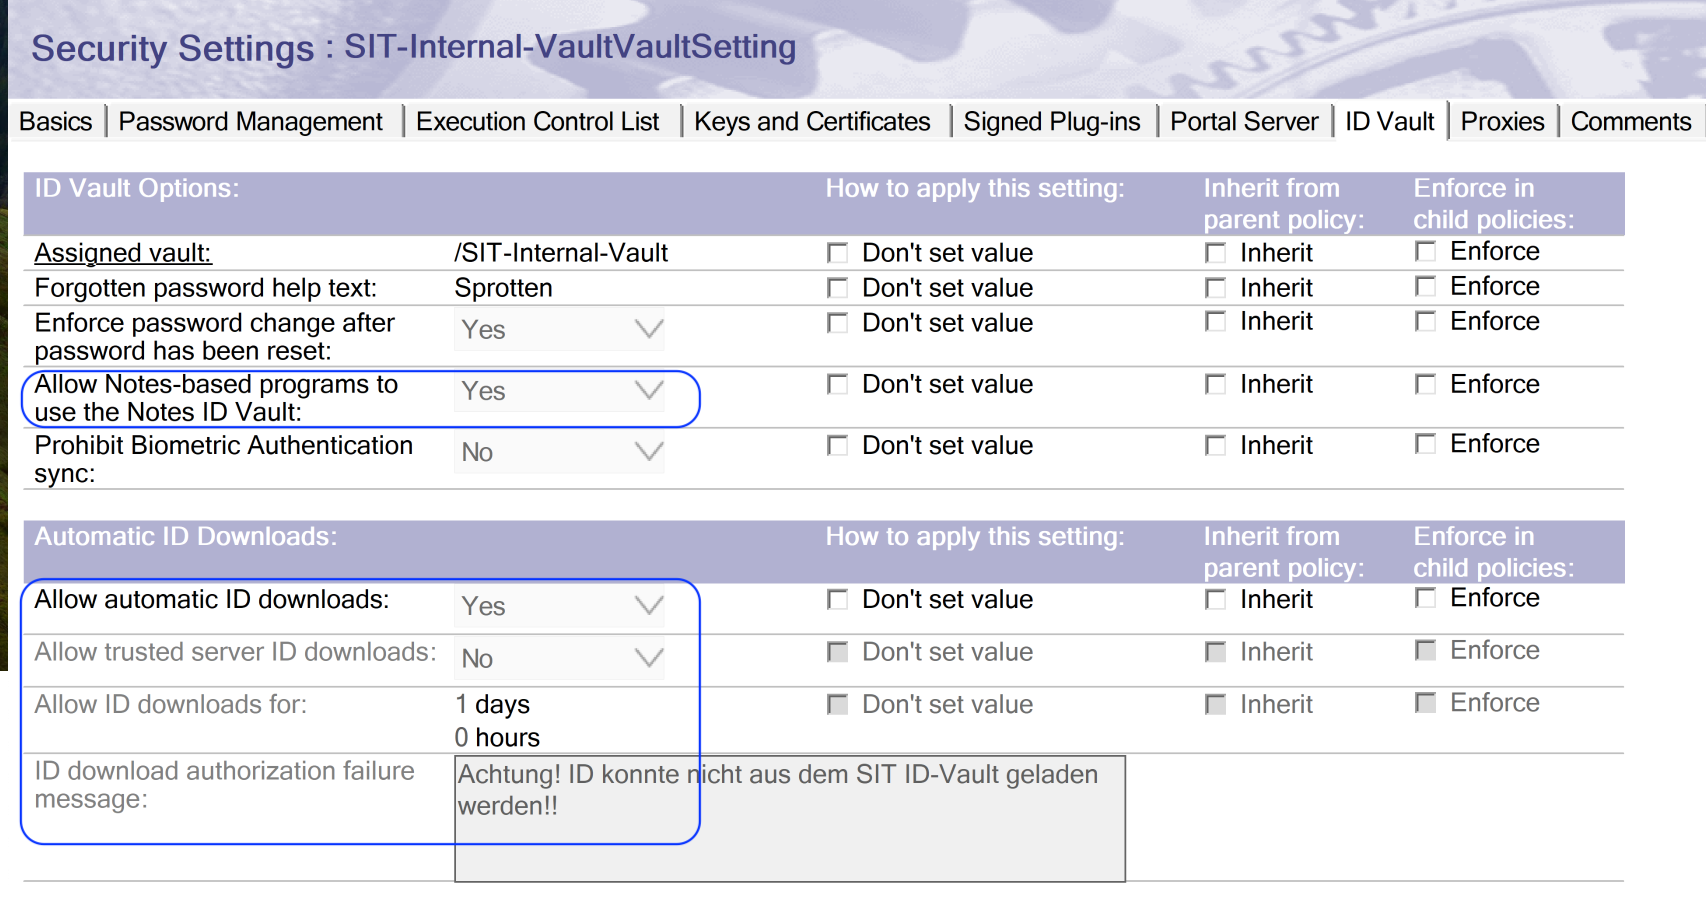
Then, switch to the "ID Vault" tab and change the following settings:
Step 5: Restart Domino and the Nomad Task
This step is more of a safety concern - it might work straight away but I recommend restarting the Domino part before starting to test.
Step 6: Clear browser cache and check results
Now, let's re-configure HCL Nomad Web. Clear the cache of the browser to start from scratch.
One change you should see when the ID gets extracted:
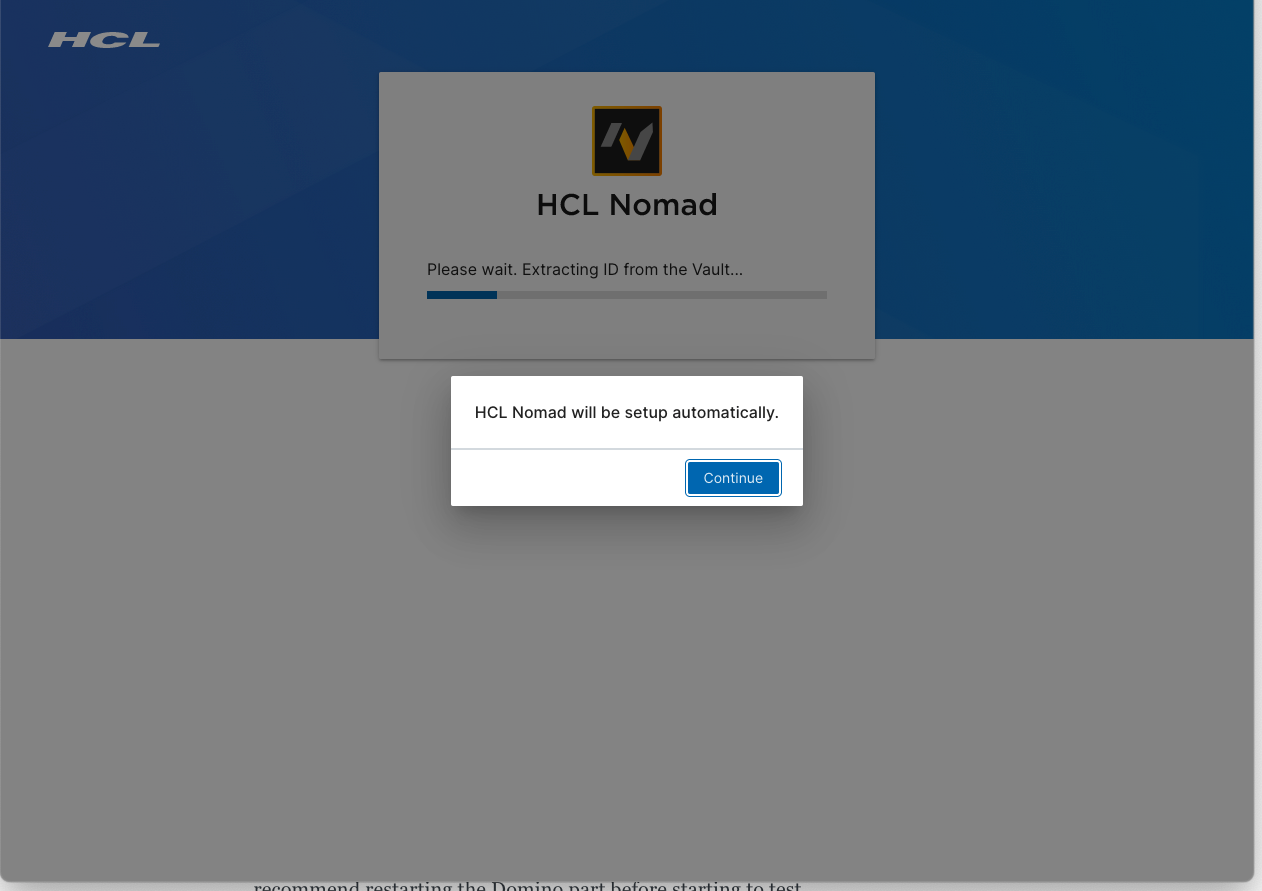
And ... after a few minutes:
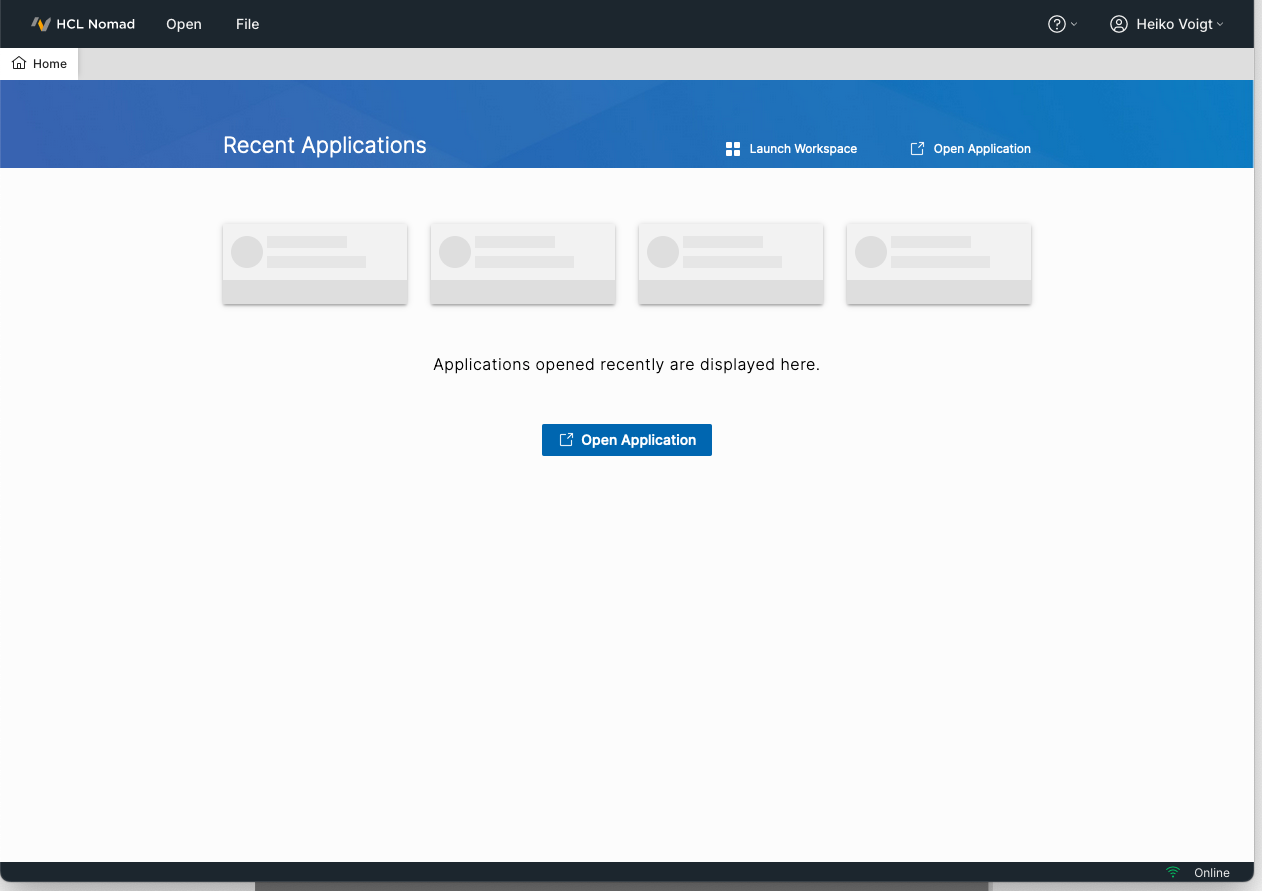
You should be done WITHOUT any Password prompt for the Notes ID.
And this concludes our series.
Happy hacking,
Heiko.