
Wow - it's been REALLY long since I started my first post about SAML SSO with Keycloak and Domino. Today, we are going to take a look at Nomad Web on Domino (no Safelinks) and how we can make use of SAML to authenticate against the HCL Nomad Web Server and (in Part 3 of this series), the ID Vault to be able to unlock the Notes ID without a second password prompt.
Let's take a look at the architecture we want to achieve:
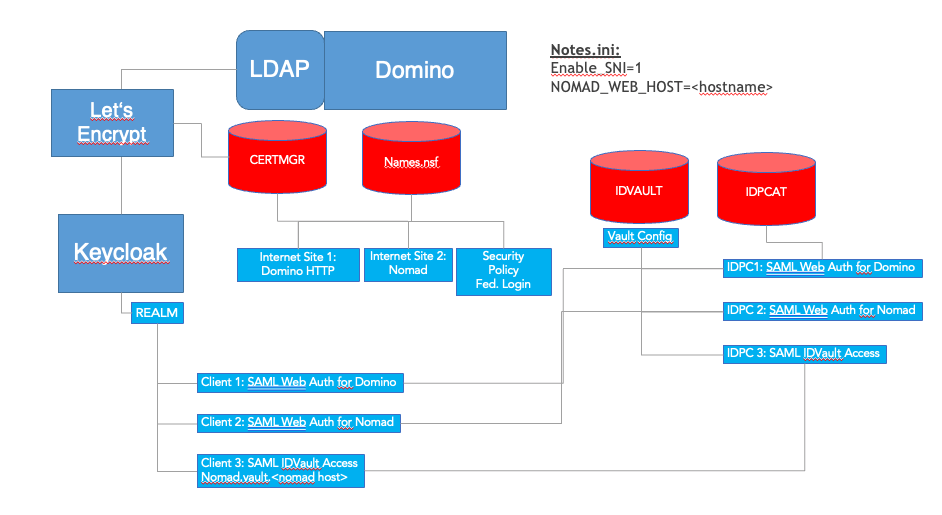
What are the parts of the diagram we will NOT go through here:
- We will NOT configure SAML Aithentication with the Domino HTTP Task - for this series, I consider this to be working successfully already, same goes for the corresponding ID Vault configurations.
- We will NOT be setting up TLS with CertMgr in this series but this needs to be done beforehand as it is a basic requirement.
- Also, I expect Nomad Web to at least be installed - it can be configured, but we will change the config down the road.
- We will NOT set up the IDCat.nsf as I expect it to already be there and replicated to the relevant servers as part of the general SAML Web Login configuration.
Step 1: Nomad SAML authentication
Stop the Nomad task if it is already running.
1.1 Set up the Keycloak Environment and the Client definitions.
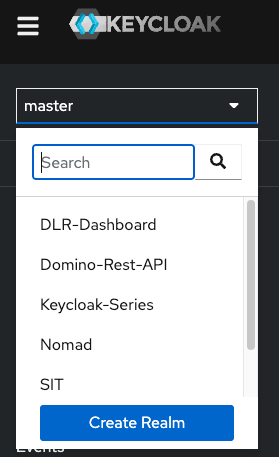
Let's switch to Keycloak now. We have to define a service provider in Keycloak which in Keycloak Terms is a Client Definition in a Realm. For that, Log in to keycloak with an admin user and select your corresponing Realm from the Realm List - don't do this in "master" as this is only for the keycloak config itself - it is not usable for applications whatsoever.
1.1.1 Set up a new Realm if you don't have one
If you haven't set up a realm in keylcoak yet, it is time to do so now. A realm can be considered as a logical entity for grouping resources into a shared domain. All definitions in a realm can be used for cross-protocol SSO operations, meaning, you can e.g. log into keylcoak from your OS using a Kerberos token, then access a Domino Server via Notes Client or Browser using SAML authentication and next access a Web Application (even on Domino) using OIDC Authentication. In either case, keycloak will not prompt your for a password again but will transition your Idenity in between these protocols and token formats.
This also means, that service providers that are defined in different Realms can not share their identities in SSO combinations. With this, you can e.g. keep internal users separate from external or guest users of your system.
For the sake of our venture, we will create a realm here and add all the necessary service providers to that realm so we can share login credentials between them, in our case this is the web authentication for Nomad Web as well as later on the ID Vault operations needed to extract the Notes ID when we set up Nomad Web.
To create a new Realm, log in to your Keycloak Admin Console, and select the Realm list in the top left corner. Click "Create Realm"
Here are the sample settings we will be using for this demo:
General section:
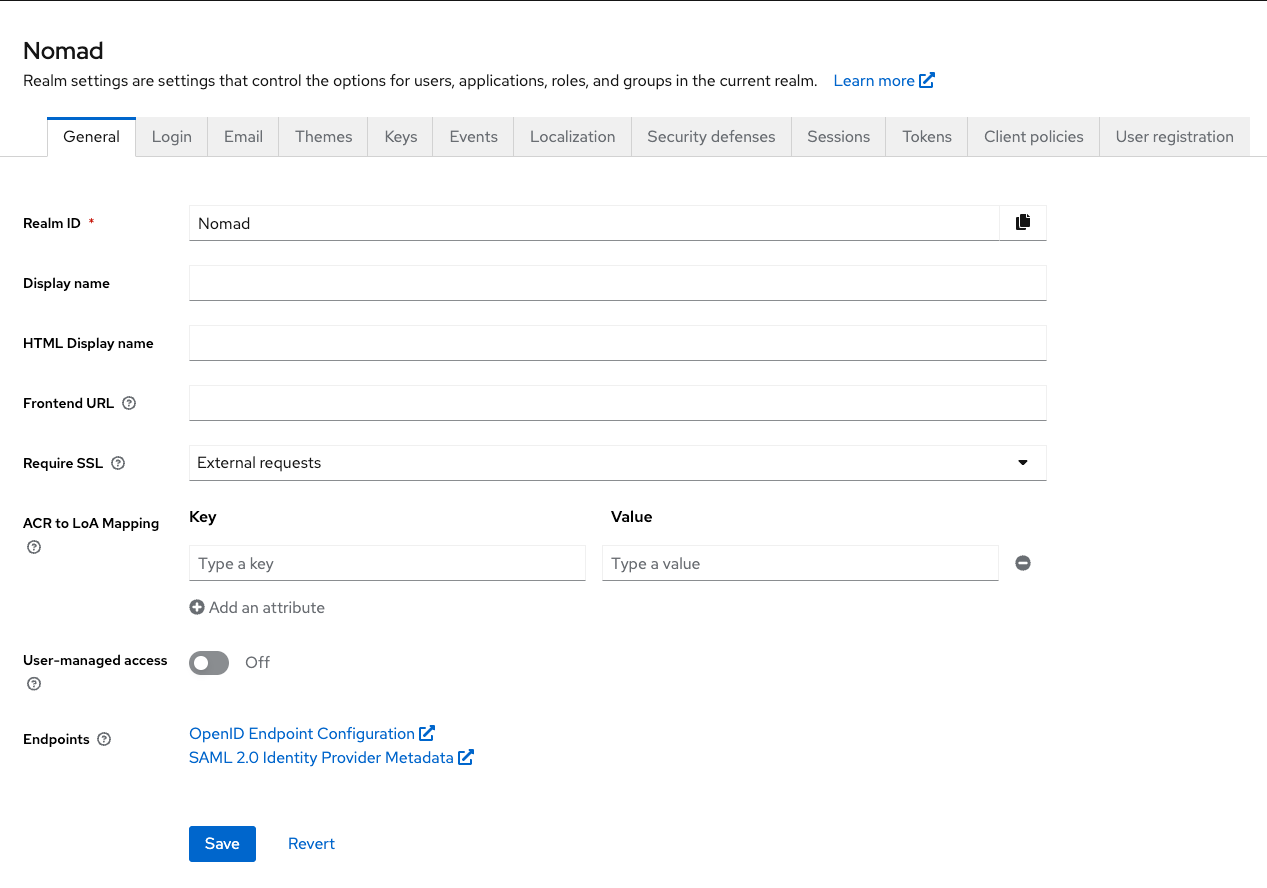
When we are done here, please export the SAML 2.0 Identity provider metadata from this realm to use as base for the IDP Catalog documents. See Section 1.1.3 below!
TIPP! Make sure to save every change on the respective tab - changes are lost, if you don't save them and switch to a different tab, even if you save the changes there!
Login section:

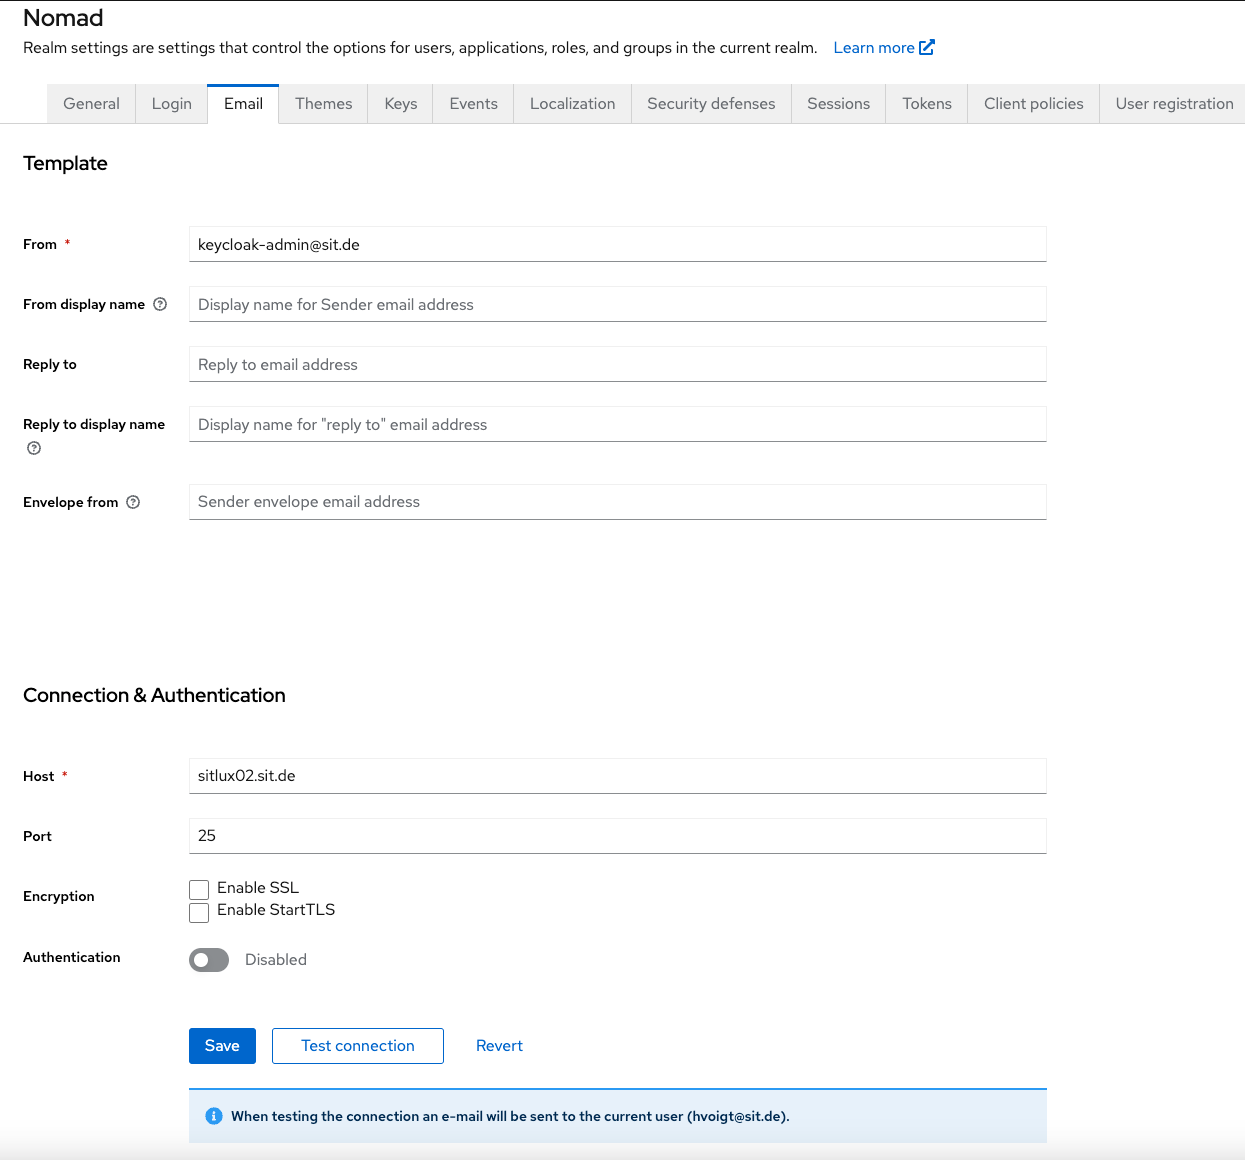
E-Mail Section:
Change the SMTP Settings to point to your domino server if needed.
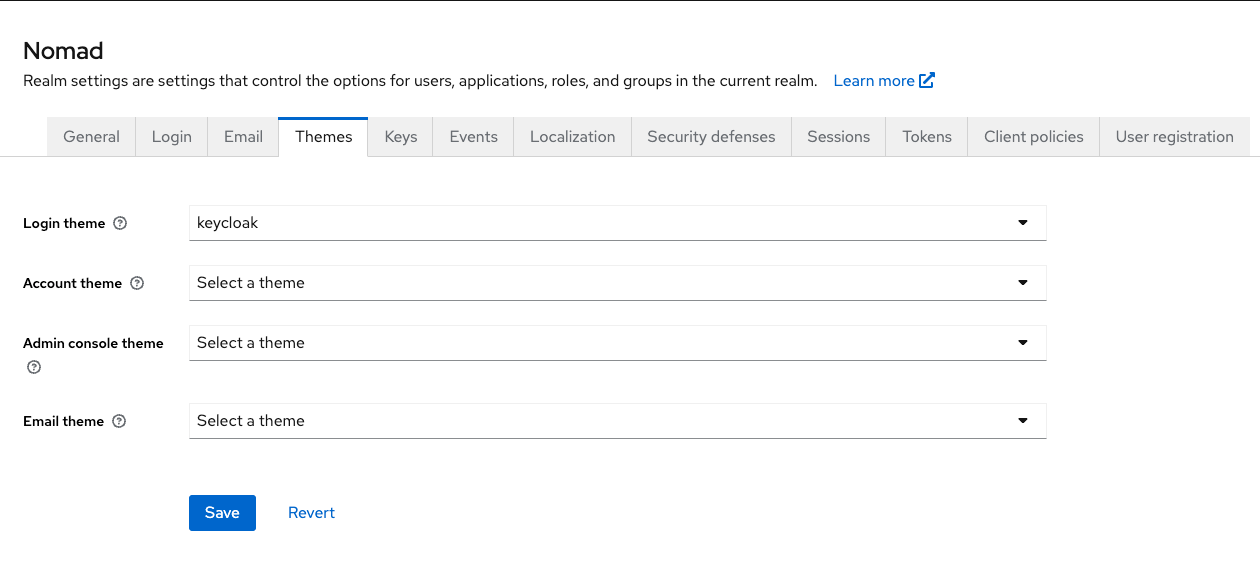
Themes Section:
Events Section:
No changes to default here.
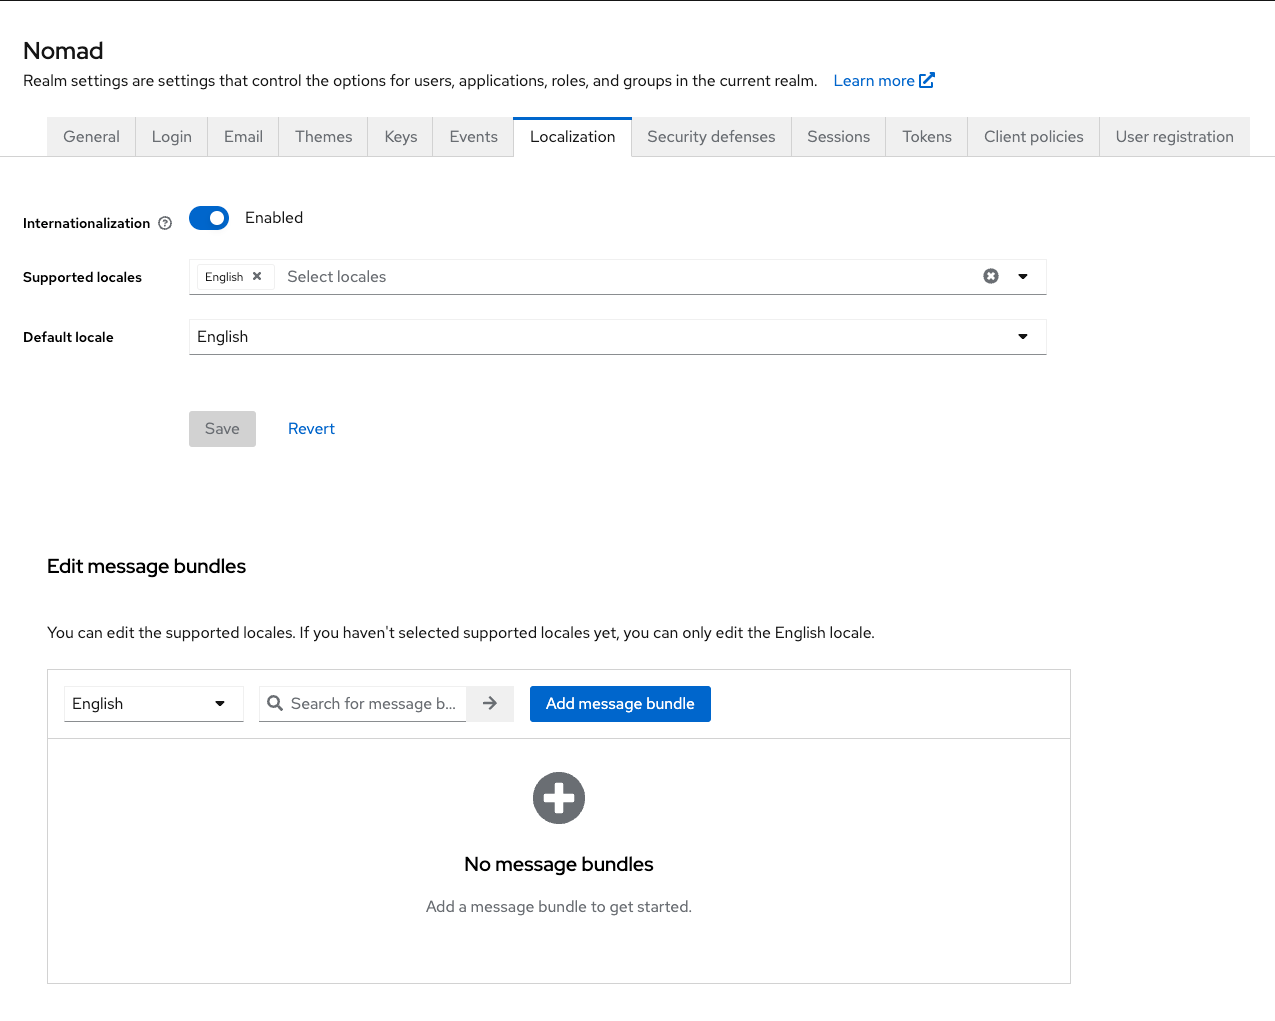
Localization Section:
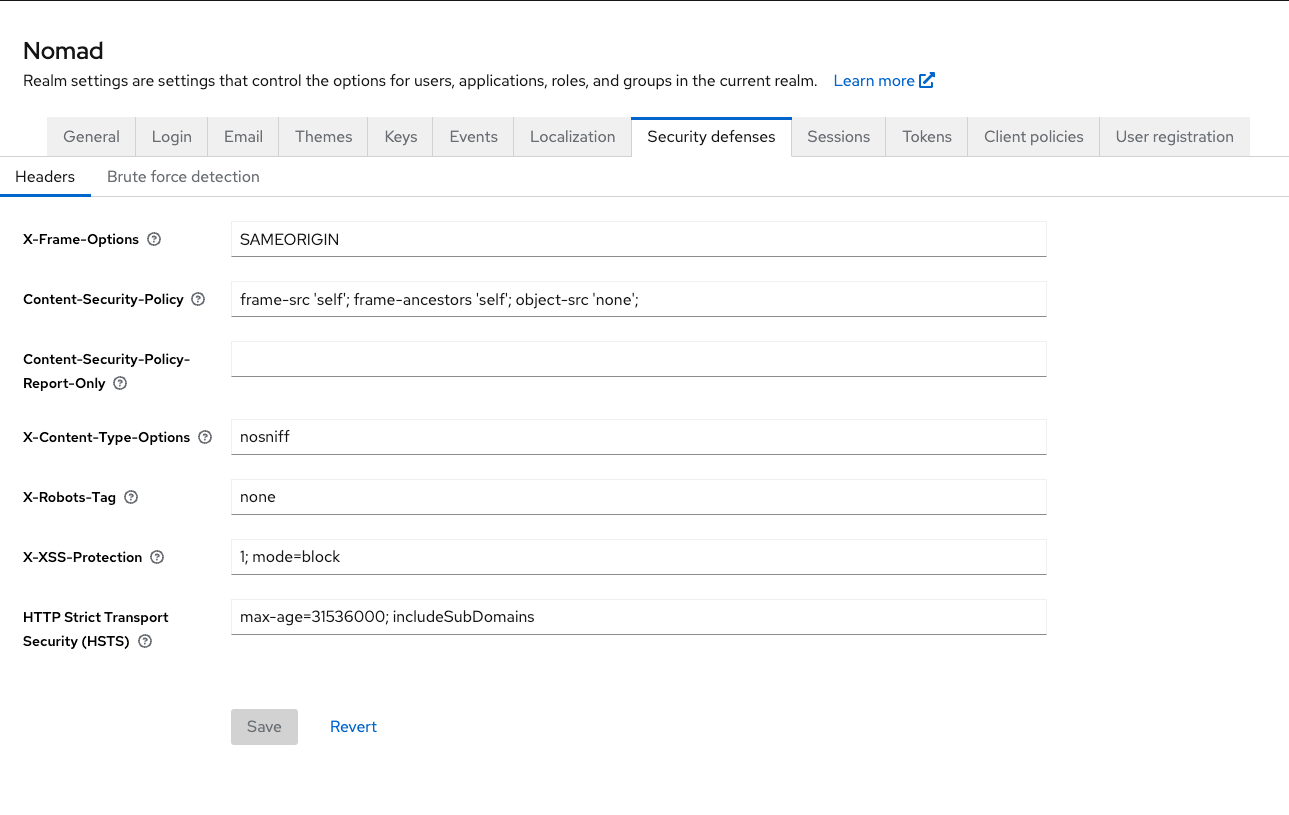
Security defenses Section:
For the sake of this demo, I went on with the defaults:
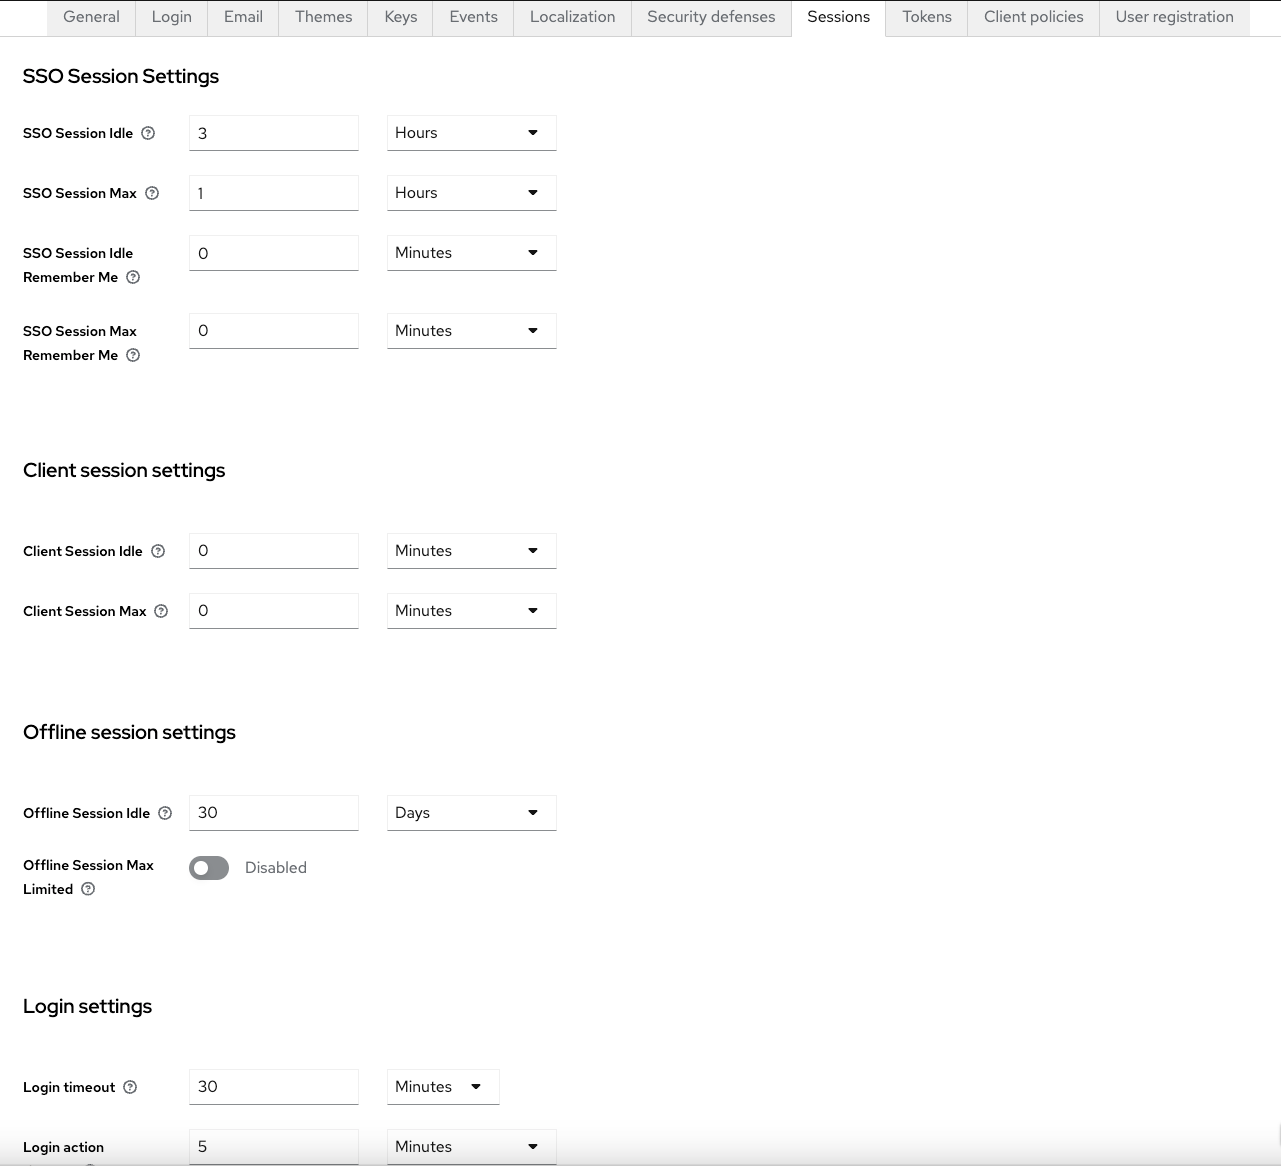
Sessions Section:
We changed the token validity time settings for some; not needed by default. Here are the settings we are using:
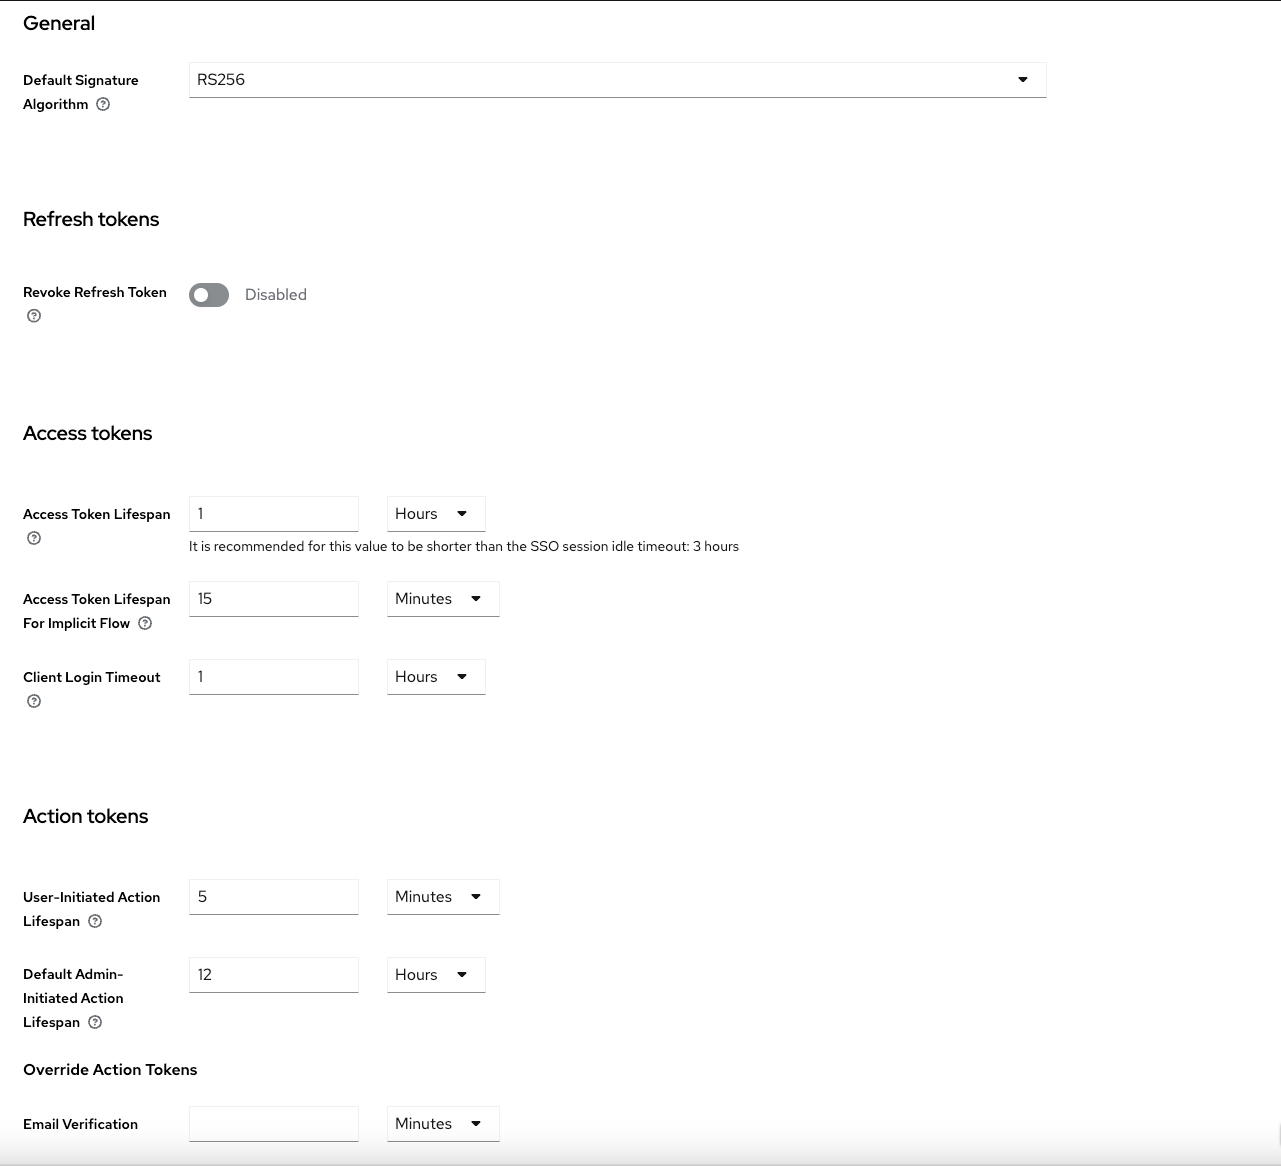
Tokens Section:
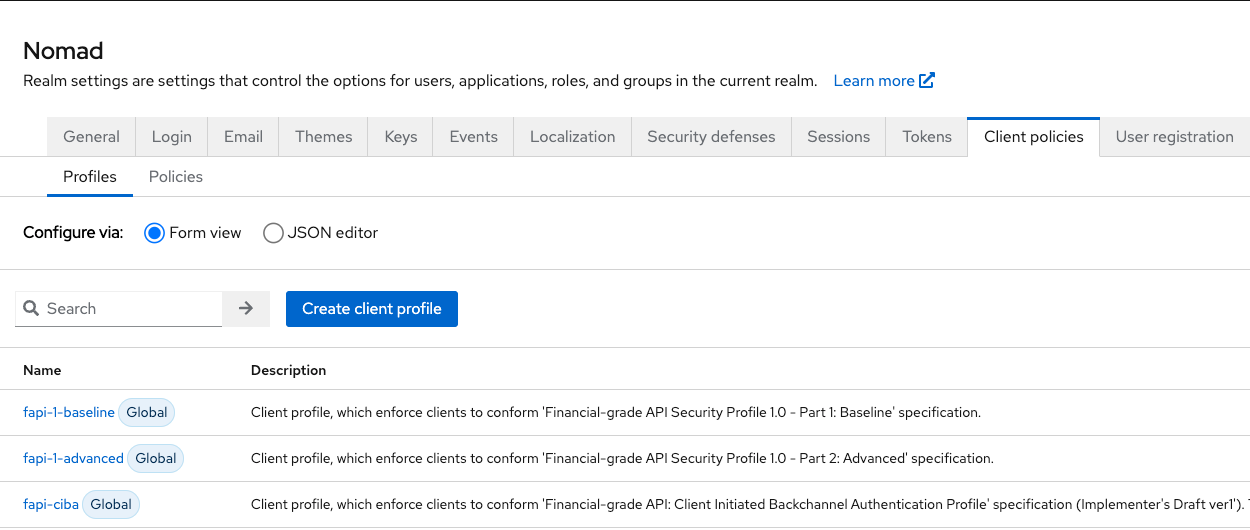
Client policies Section:
No changes from default here:
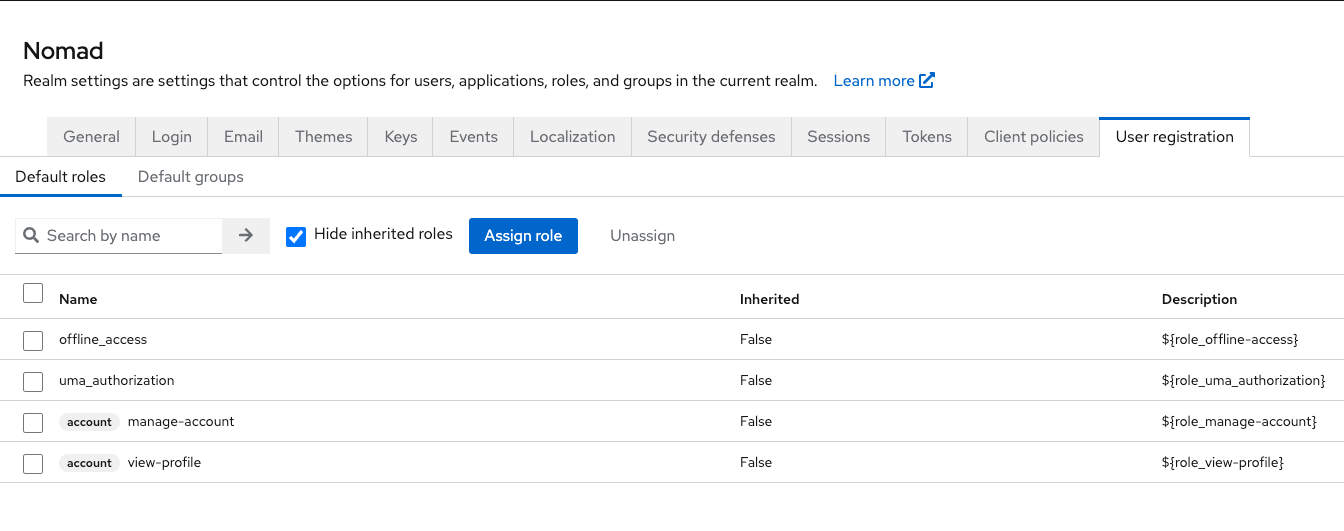
User registration Section:
Also, no changes from default.
This should leave you with a working Realm in Keycloak.
1.1.2 Set up Domino LDAP as user registry, if you did not do that before
To hook up your Domino Directory plus DA as user repository for Keycloak, we need to define an LDAP Server. This works with Non-SSL LDAP Configs on Domino but we definitely recommend to use TLS Secured LDAP Config here. We do not cover the LDAP Domino Setup here, please check the HCL Documentation for that.
In Keycloak, we do this in this section:
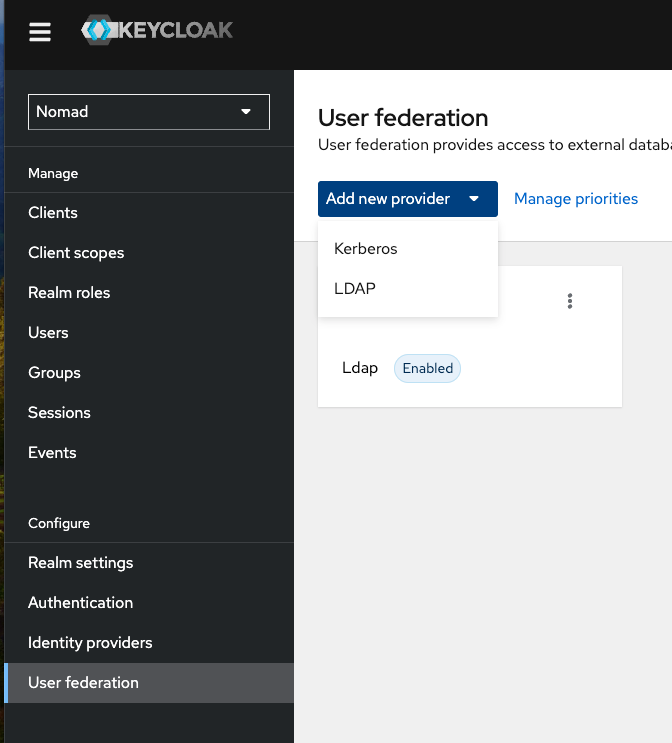
Select "User federation" from the left menu inside of your Realam and click "Add new provider". Select "LDAP".
The next screenshots show you the definitions we are using - please a
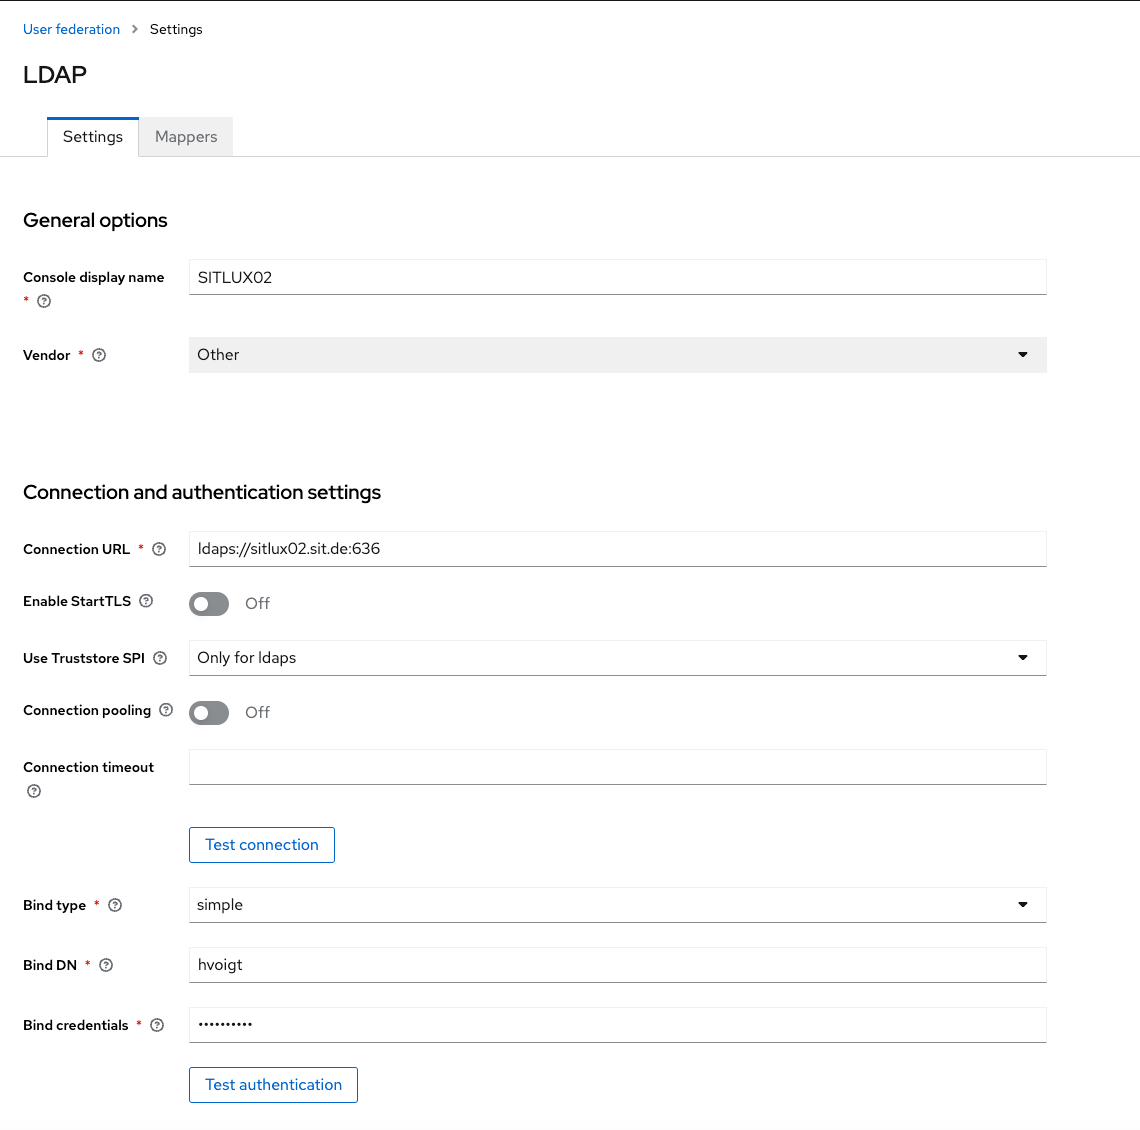
Usually, we use a technical user as the bind DN. This usually is the short name of the user in Domino Directory plus the internet Password. Check the connection and the authentication here and make sure this works.
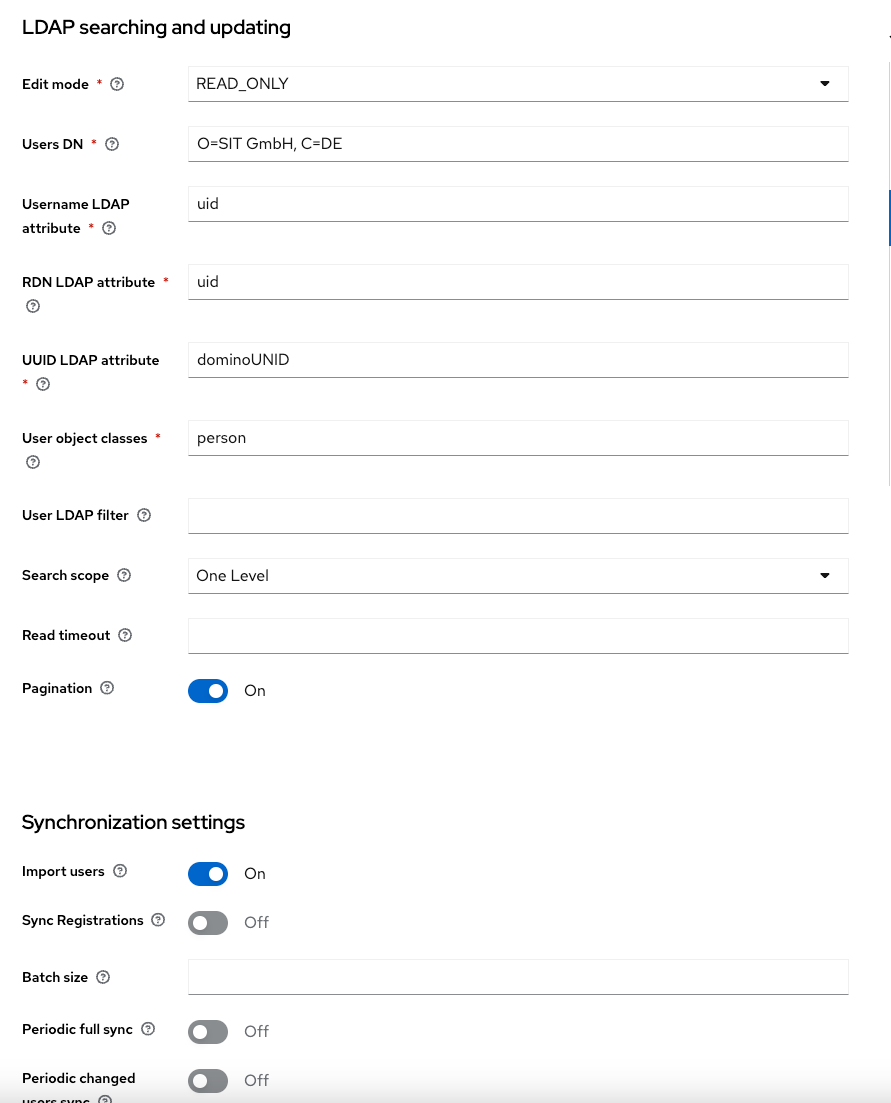
We will not make any changes back to LDAP as this won't work with the current Domino LDAP implementation. For the DN, we use our Domino Organizational Settings, please don't use the Domino notation but a comma separated list here. Change the UUID LDAP Attribute to dominoUNID and the user object class to "person". In Synchronization settings, please witch on "import users".
This should be all you need to hook up Domino LDAP to Keycloak !
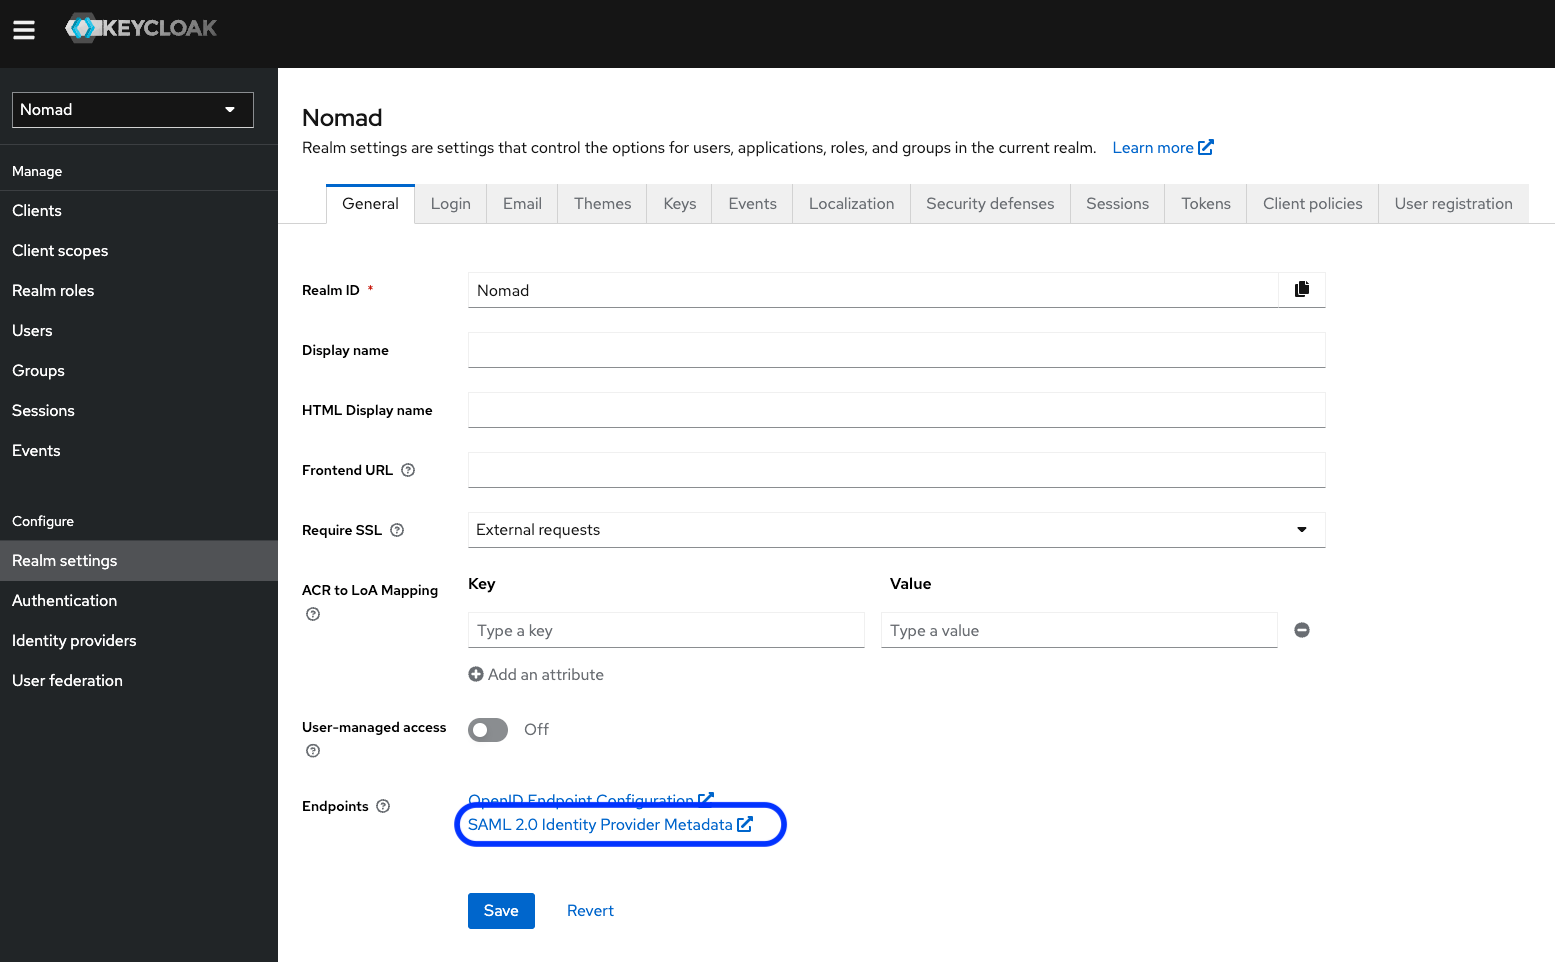
Step 1.1.3 Gather the Keycloak SAML Definitions from the Realm Settings
We do this be saving the SAML 2.0 Identity Provider Metadata as an XML File using "Save link as..." in your browsers right mouse click menu when you hover over this entry in your Keycloak Realm Settings:
Save the file to a local disk and remember the name. Make a 2nd copy of it, as we will need two of them later on.
Step 1.2 Set up notes.ini and nomad-config.yml
nomad-config.yml resides in the notes data directory on the nomad server. Here's a sample:
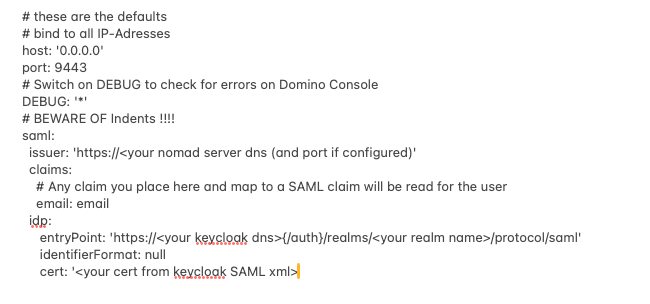
Most of the information needed above can be found in the XML we previously downloaded from Keycloak:
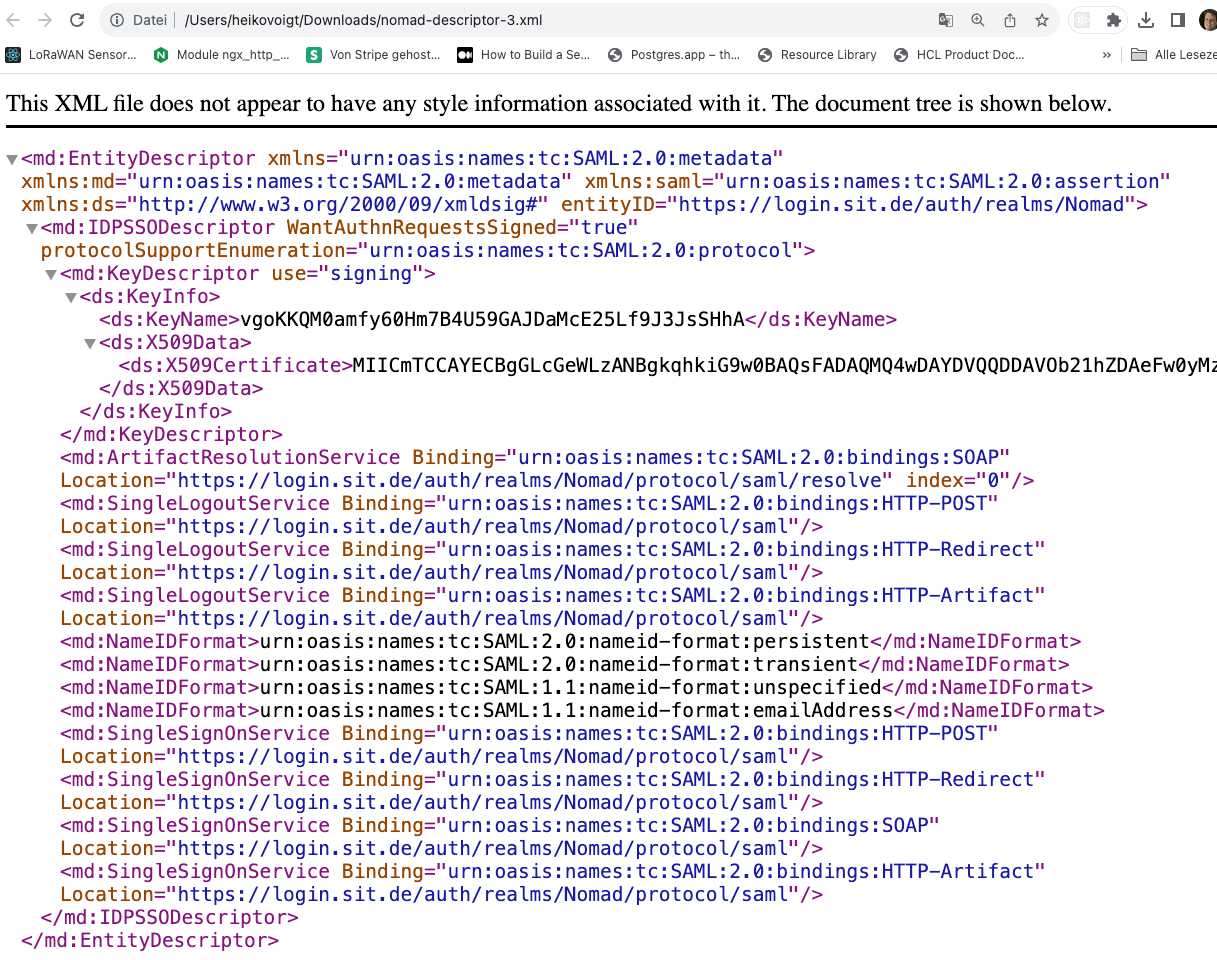
The cert is the X509Certificate data above, the entry point is the Login Service part, here in my case:
<md:SingleSignOnService Binding="urn:oasis:names:tc:SAML:2.0:bindings:HTTP-POST" Location="https://login.sit.de/auth/realms/Nomad/protocol/saml"/>
In the Notes.ini we will set the nomad hostname if not yet present:
NOMAD_WEB_HOST=<your nomad-web DNS hostname>
1.3 Set up the IDP Catalog Document
Let's start now with the Nomad Web IDP Configuration. Please see our sample configuration below:
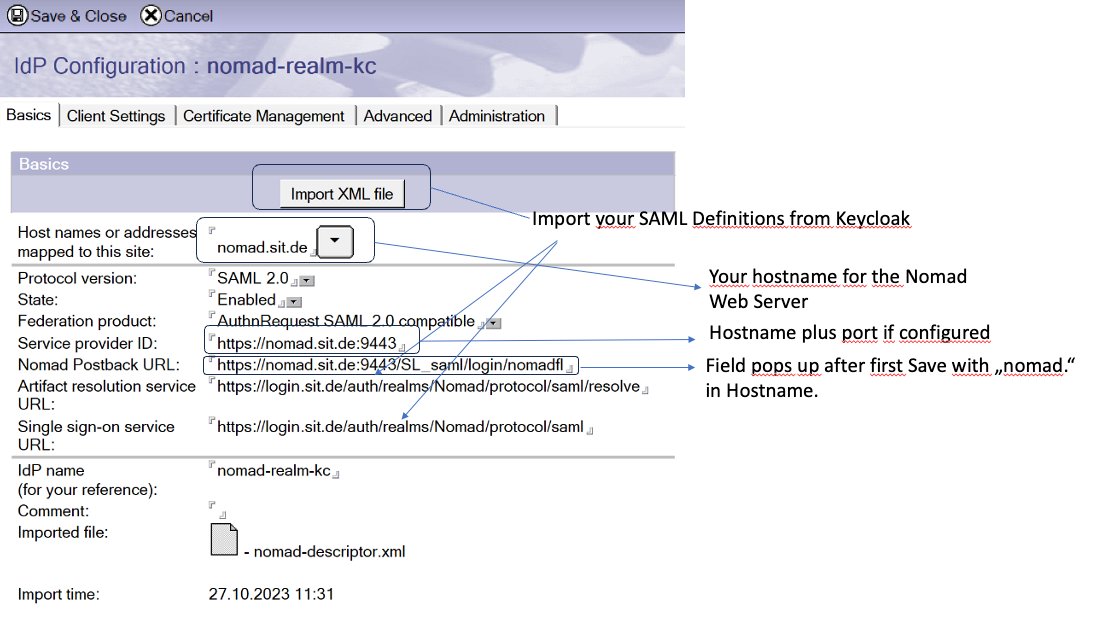
IMPORTANT: Save the Document once before you head on to the next tabs!
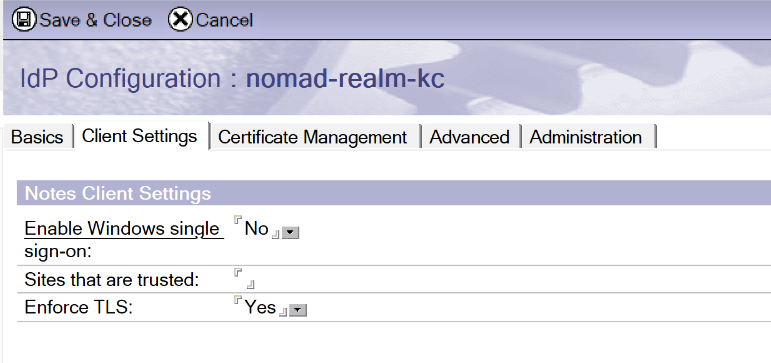
On Client Settings set Enable Windows single sign on to "No".
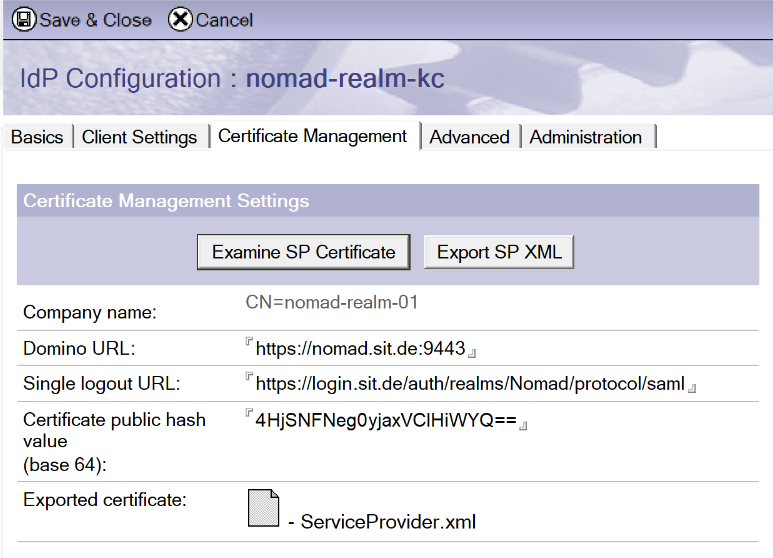
On Cert Management, click "Create SP Certificate", choose a company name (can be anything, see above and adept). This will create the public hash value, Single logout URL should already be populated from your Keycloak XML import.
Re-enter the document in edit mode, add the Domino URL, which is the same as the Service Provider ID field on tab 1, save the document.
Now, click "Export SP XML " - save the newly attached ServiceProvider.xml to disk. We will use this to define our Keycloak Client in a minute.
1.5 Eventually, set up the Keycloak client definitions
To set up the Keycloak Client, we will use the Service Provider XML from Domino as created above. Here's how we do that and how our client set up looks like in Keycloak.
In your Realm, select "Clients" from the menubar on the left. Then, select "Import Client". This brings you here:
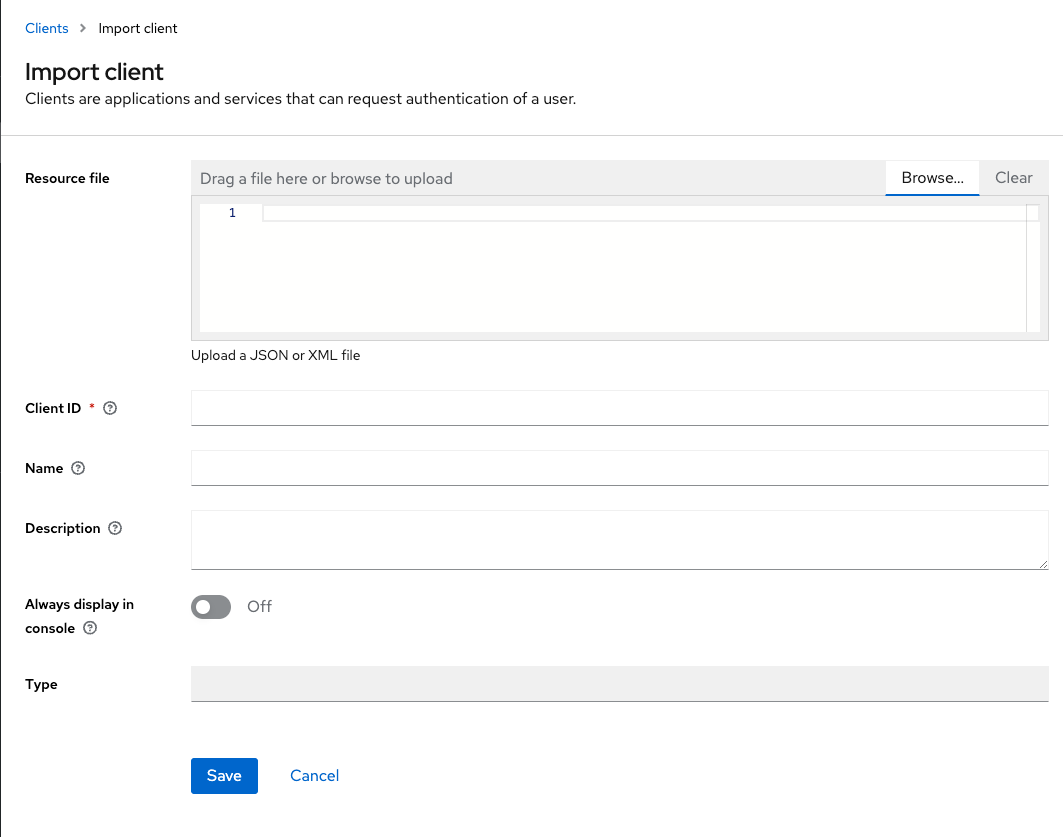
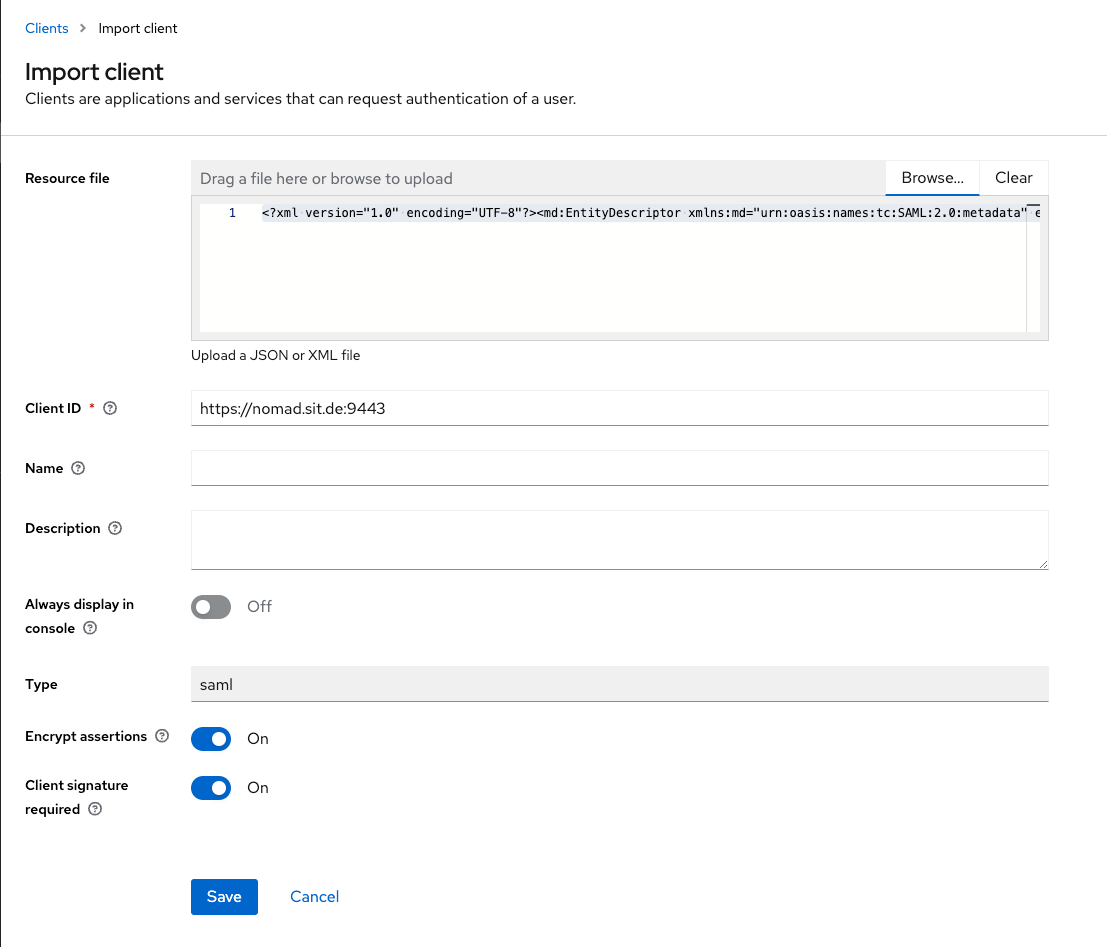
Click "Browse" and select your exported Domino SP XML. This brings you here. Leave the settings below as the come from your SP.xml and hit "Save". We will do the necessary changes afterwards.
Go back to the "Clients" list in Keycloak. You should see your newly imported client in the list now. Open the definitions again to make some changes. This will bring up a form like this:
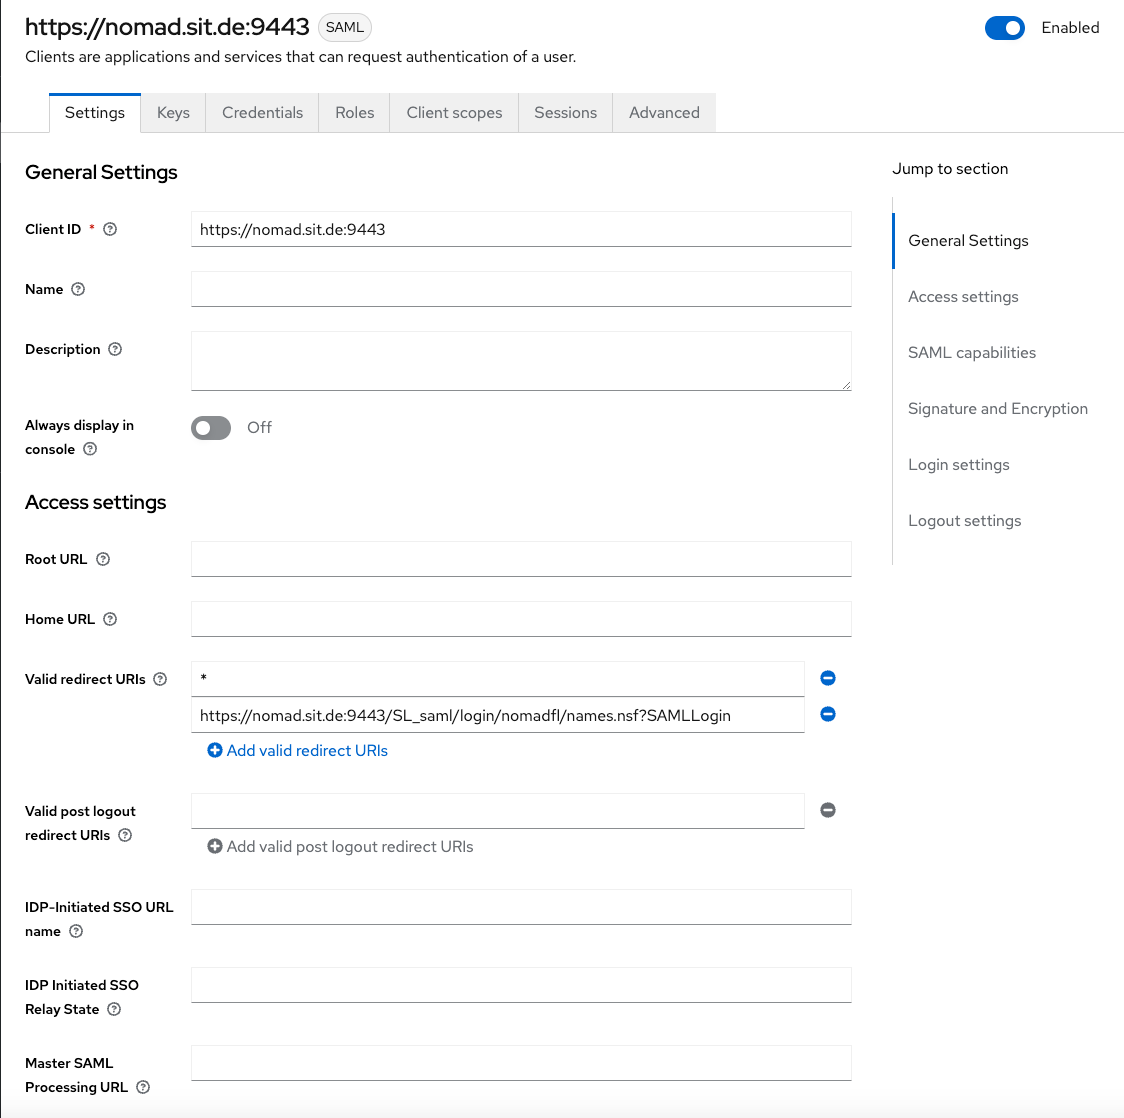
For the sake of the demo, I usually add a "*" to the list of valid redirect URLs. This get's removed in production later.
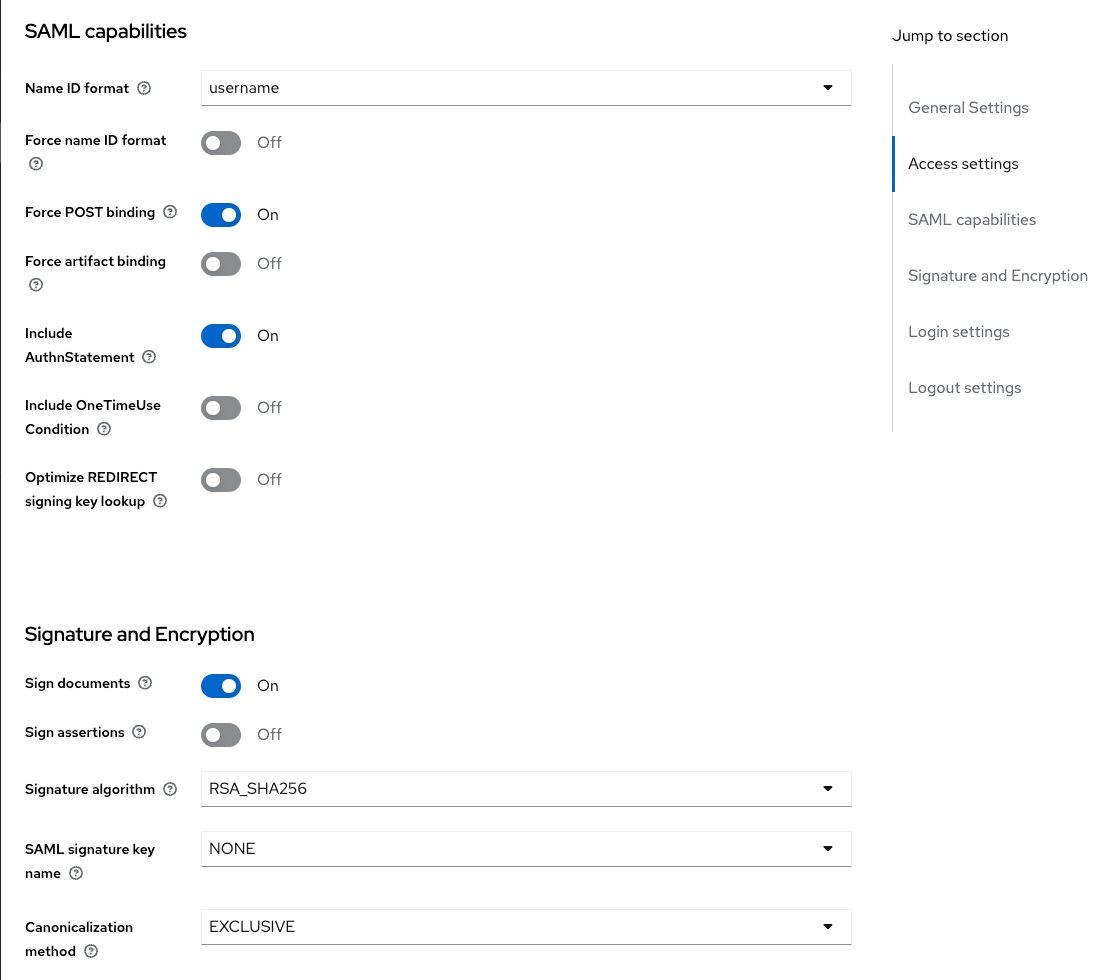
In the SAML Capabilities section, we switch on "Sign documents" and switch off "Sign assertations".
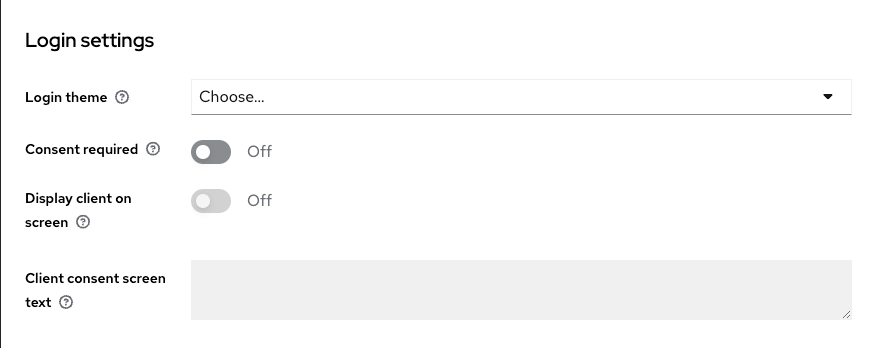
We don't do any changes in the Login Settings.
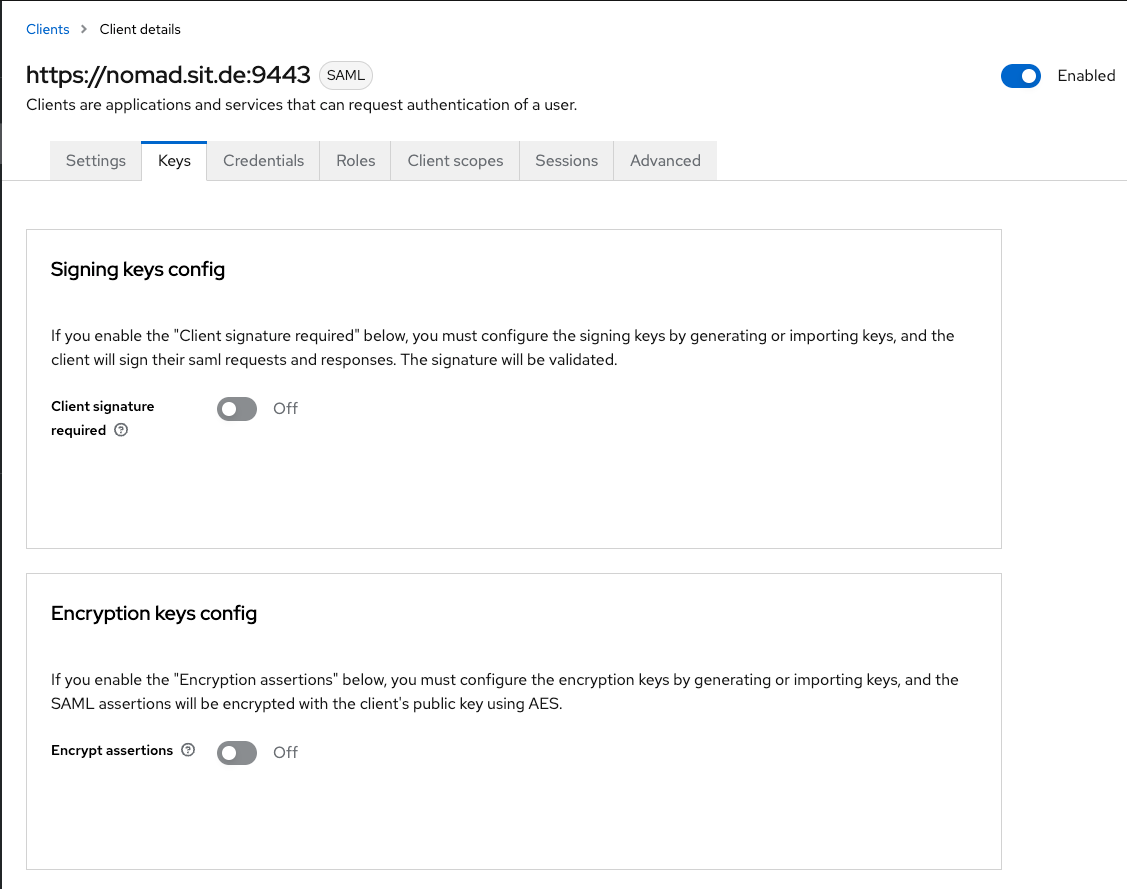
In the Keys section, I switched off "Client signature required" and "encrypt assertations". Keycloak will warn you about losing the keys, but they are prevailed for you - and even if not, we can always re-import them from the Domino SP xml file.
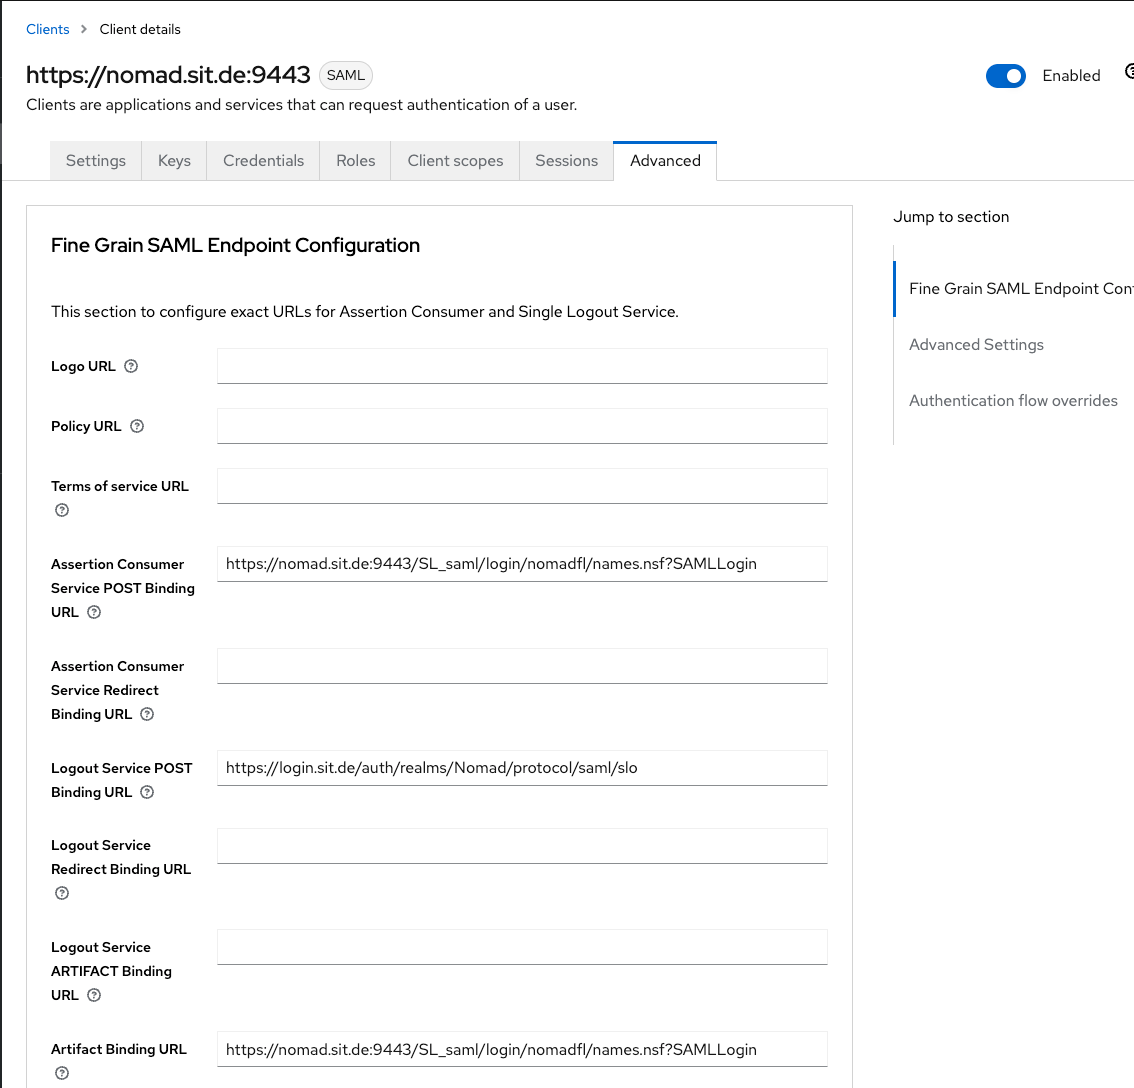
In the "Fine Grain SAML Endpoint Configuration" section, make sure the the three settings are filled form the Domino SP XML.
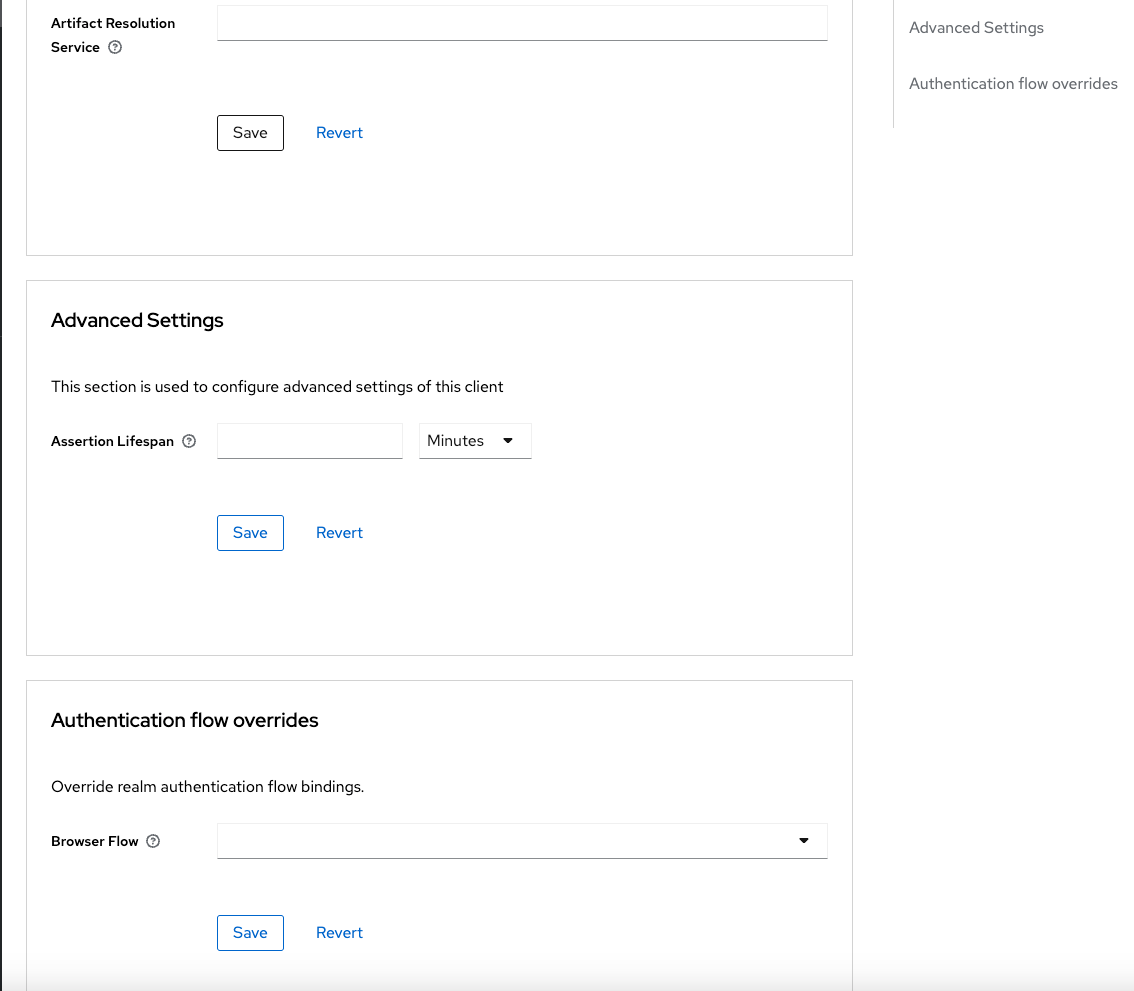
In the Advanced Settings area, we don't do any changes.
That concludes the setup of the Keycloak Client for Nomad Web Auth.
1.6 Start Nomad & Check the results
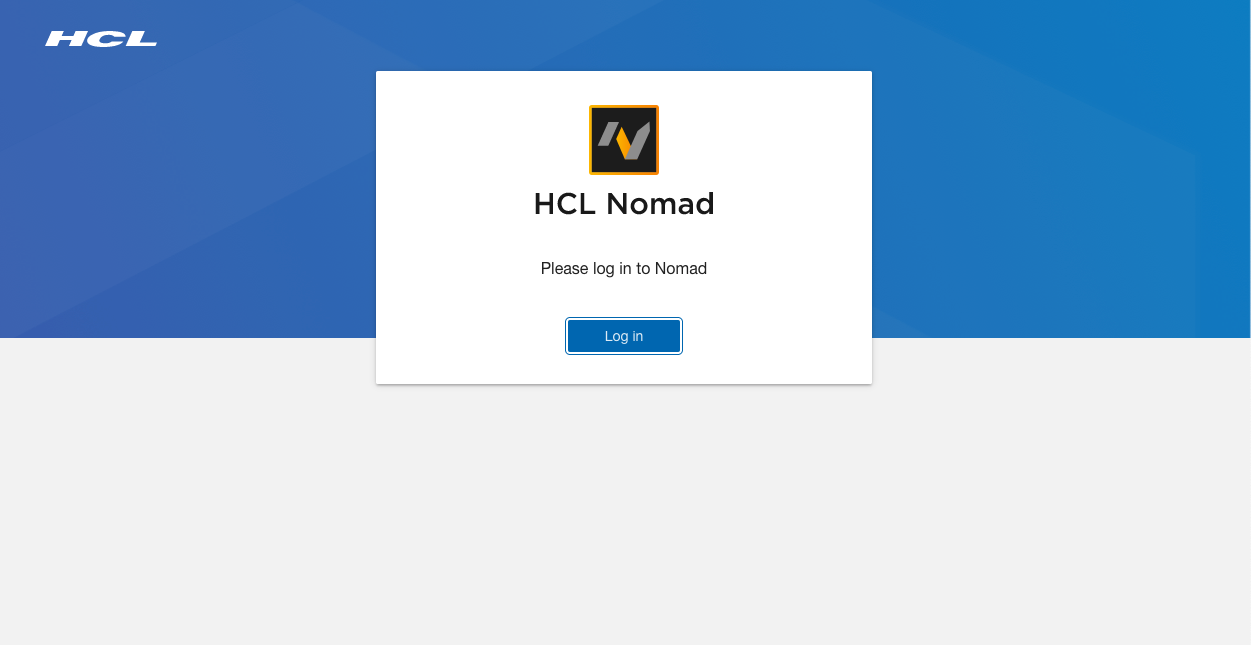
Now, start Nomad on your Domino Server and log in using a browser to access the Nomad Endpoint. Make sure, you set up Nomad from Scratch, so please clear your Browser Cache, if you had previous Nomad setups on your browser.
For login, you should get redirected to Keycloak. Then, Nomad setup should be working as normal and you should get prompted for your Notes ID Password later in the process and get Nomad up and running like so:
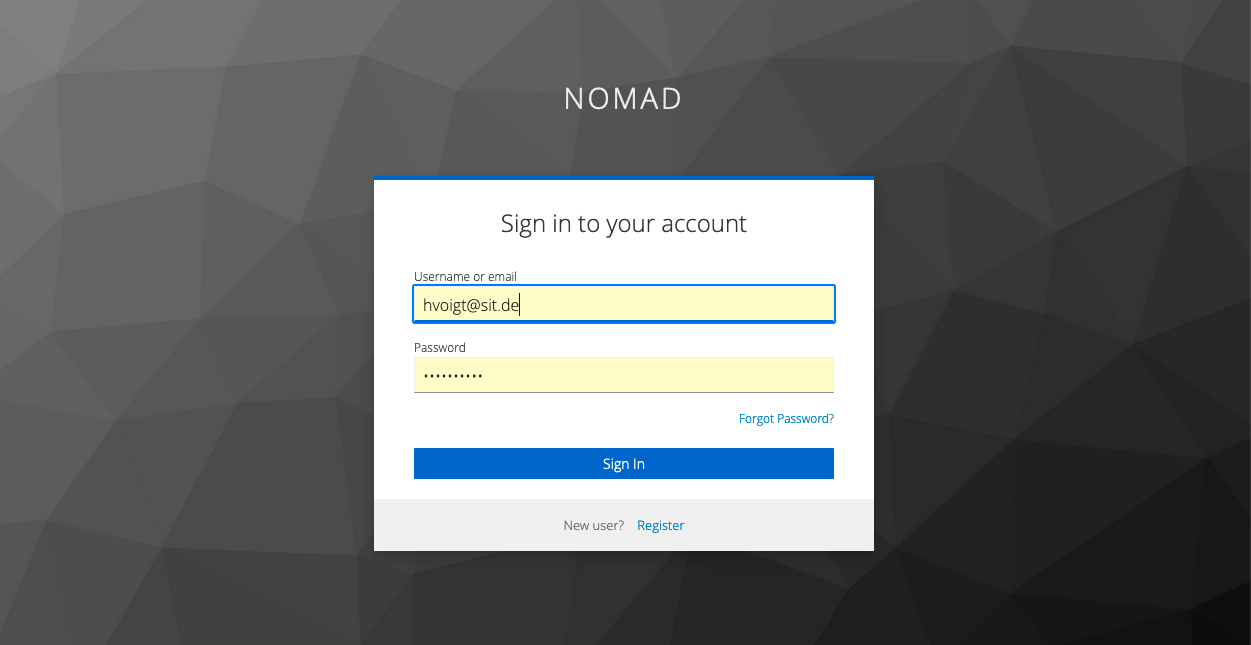
On the Keycloak side, we authenticate against our configured Realm.
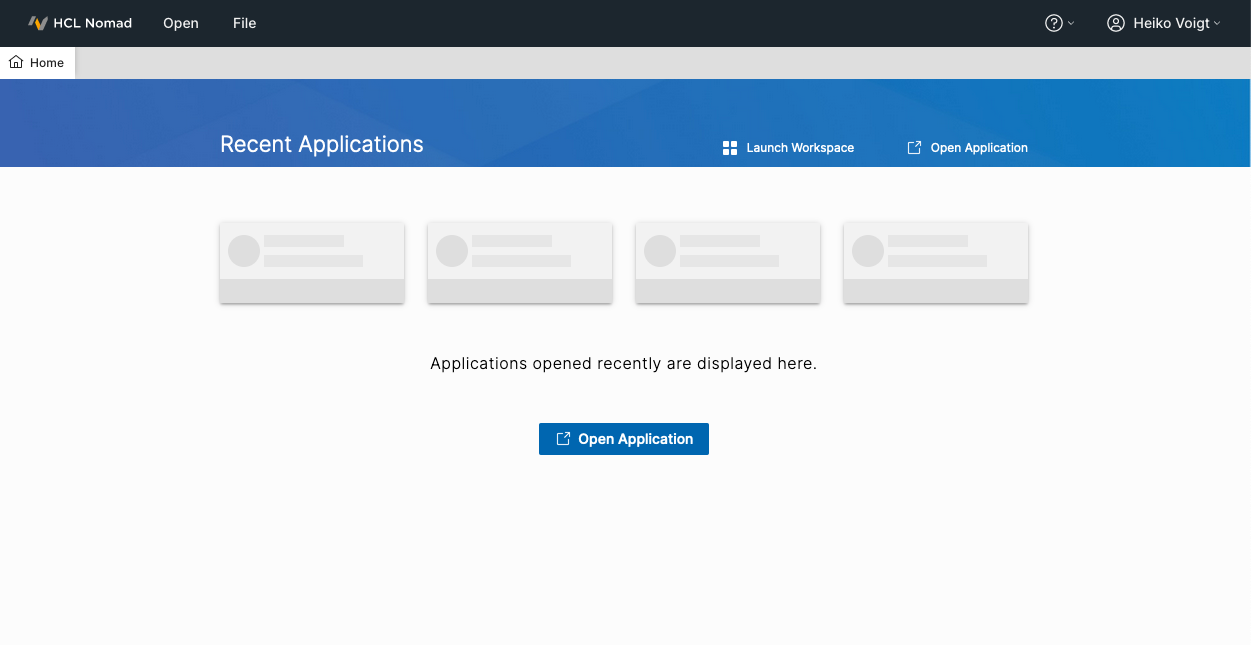
Et voilà - Nomad Web !
Final words for this part of the series
This concludes part 2. We are able to authenticate agains Keycloak and set up our HCL Nomad Web Client using SAML Authentication.
In the next part, we will configure the ID Vault access to prevent the password dialog for the Notes ID and use our SAML token instead to let keycloak and Nomad handle a trust here.