
So - here we go again. Due to some unforseen circumstances, it took me a while to get going with my 2nd article of this series.
Link to part 1: https://heikos-blog.ghost.io/new-series-hcl-domino-web-development-with-htmx/
In this part, we will take a look at the basic app architecture of what we are going to build. We will then start to build our basic services on the server side to create a fist communication between HTMX and our back end.
So, what does the app architecture look like? Here's a high level chart of it:
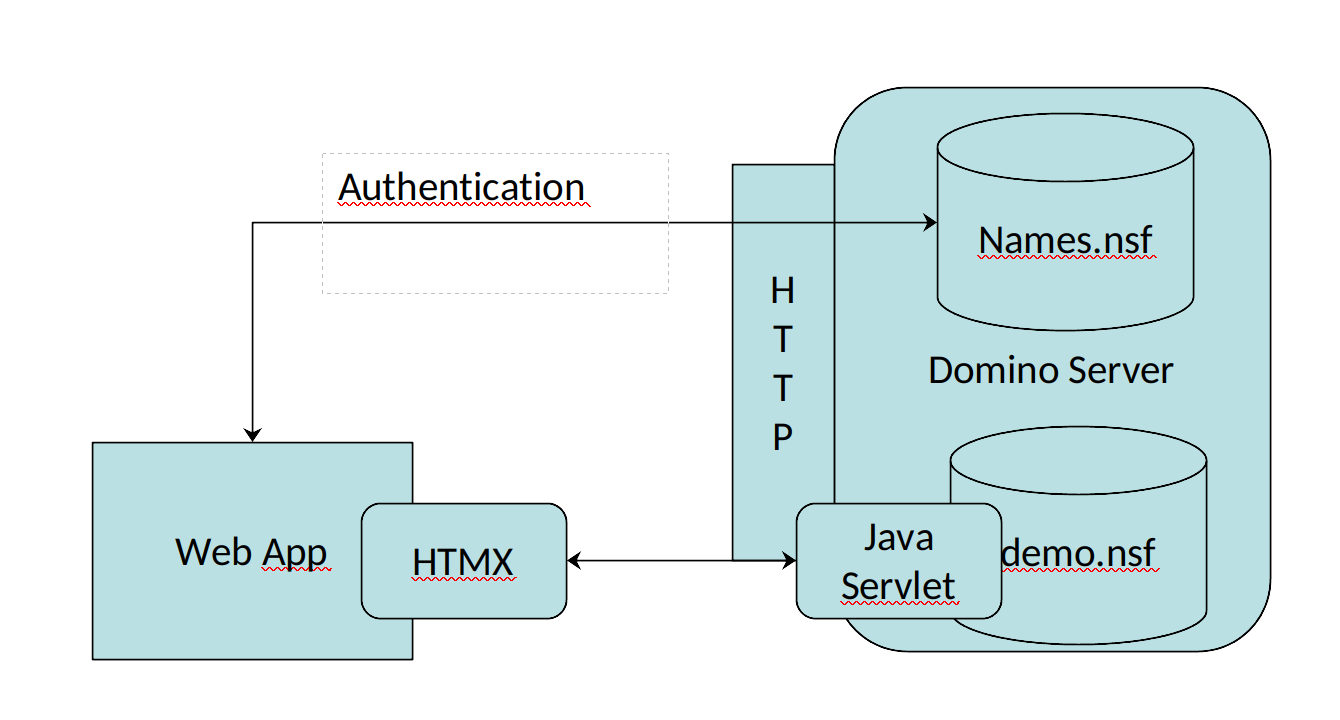
So basically, in this first parts, we will build an XPages App on Domino (demo.nsf), that contains an XPage as our Web App including HTMX and a Java Servlet inside of the NSF that works as our serverside logic and delivers the data for the HTMX frontend.
For authentication, we will use whatever is configured for your Domino Web Server - the XSP stack inherits the authentication and makes sure that calls from our XPage will be done in a named context.
Our Servlet will be part of the XSP stack as well, so it shares our authentication status - no need build anything different regarding user management. Also, a servlet is an elegant way to expose business logic for web calls directly inside of the NSF without adding any other dependencies to it. That should work from 9.x to 14.x releases of Domino, maybe even from 8.5.x onwards.
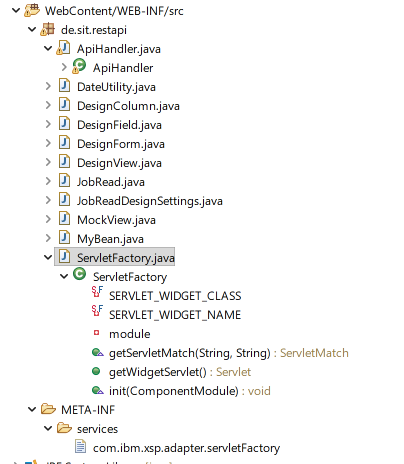
Our Servlet will be built by creating a ServletFactory class, a Definition in META-INF/services as a com.ibm.xsp.adapter.servletFactory Definition and a Implementation class, that I call ApiHandler.java. How to create this artifacts is beyond the scope here, but here's the Java project tree, that's involved here:
The combination will expose a servlet through the Domino HTTP task that we can call via the NSF and the xsp url extension like so: https://<your server>/<your nsf>/xsp/apihandler/testcall
where "testcall" is a method defined in the servlet implementation in ApiHandler.java:
private String testcall() throws ServletException, IOException {
String back = "";
try {
back = "<ul><li>Back to HTMX from Servlet!</li><li>Hurray !</li></ul>";
} catch (Exception e) {
back = "";
}
return back;
}
This will return a String with HTML back to the caller. Why HTML? HTMX expects the server to send back HTML directly. In one of the next parts, we will also see how we can work with classic REST Apis in HTMX returning JSON. But for the sake of the first check if our call to the server works, we will keep it simple like that. The Java Code is not optimized - bare with me - you can optimize it yourself I guess ;-).
How do we map the incoming URL to that method? Here's the code inside of the Servlet. We implement a "doGet" method in the servlet to respond to GET Requests from HTMX. Later, we will also implement doPost and doDelete Methods, to respond to other call types from HTMX. For now, let's stay with the doGet method.
public void doGet(HttpServletRequest req, HttpServletResponse res)
throws ServletException, IOException {
PrintWriter out = res.getWriter();
try {
res.setContentType("text/html");
res.encodeUrl("UTF-8");
String pathInfo = req.getPathInfo();
if(pathInfo.equals("/xsp/apihandler/testcall")) {
String back= this.testcall();
out.print(back);
} catch (Throwable t) {
t.printStackTrace(out);
}
out.close();
}
So, we have a skeleton Servlet that will return some HTML when we call the /apihandler/testcall endpoint.
Now, let's see how we implement our first XPage including HTMX!
But first, let's do some prepwork to help us down the road.
- First, I will import the HTMX Logo as an Image resource into the db.
- 2nd - let's create some basic CSS definitions to help with our layout of the page
- 3rd - let's download the HTMX library and add it to a folder "dist" in WebContent Folder using Package Explorer. We could load it from a CDN as well but for now, I want to be self-sufficient so let's store in the db.
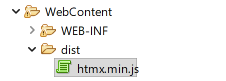
Here's the file I used:
After all that prepwork, let create an XPage in the demo app - I call it HTMTestPart1.xsp.
The first part is the base HTML.
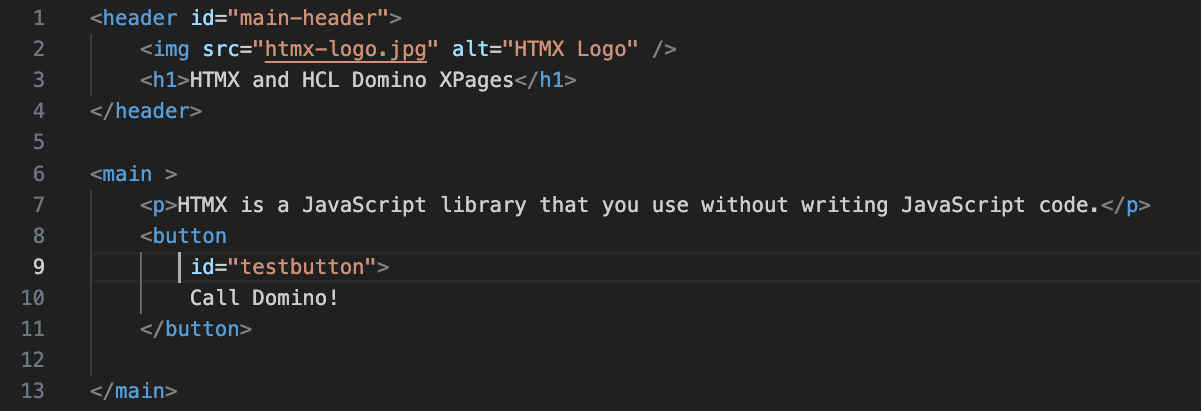
So we create a header component and a main section with a logo and some text plus a button. Now let's add HTMX and our Stylesheet to our xpage.
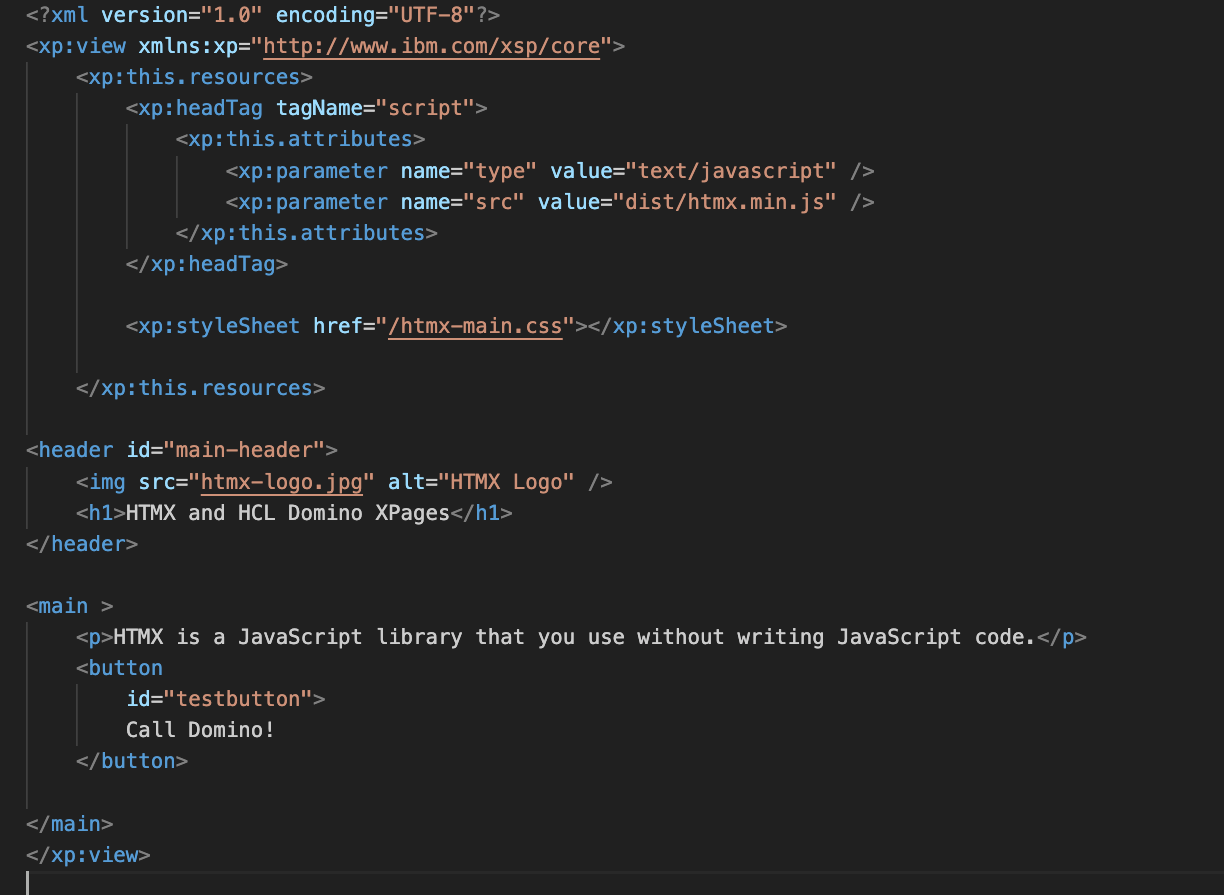
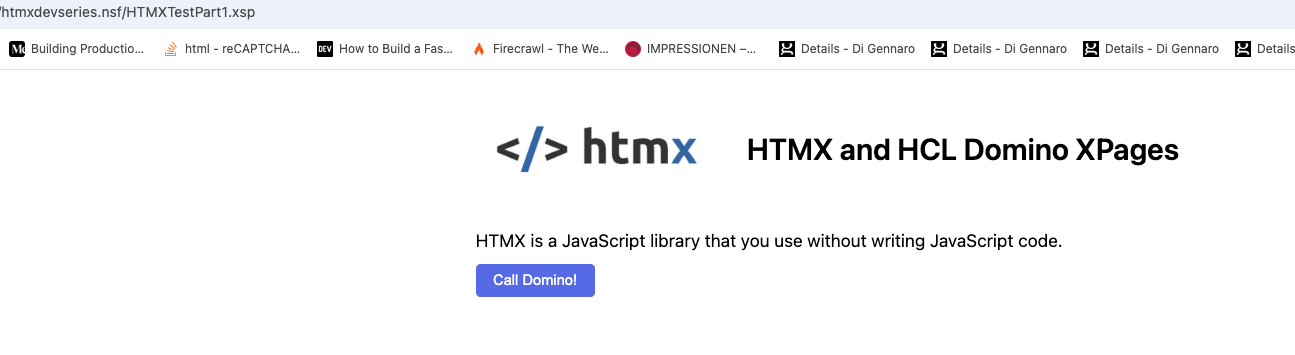
To avoid conflicts with loading JavaScript in Xpages, I add the HTMX Library as a head tag in my xpage. Then, we add our CSS. After compiling the Xpage, it should look like this:
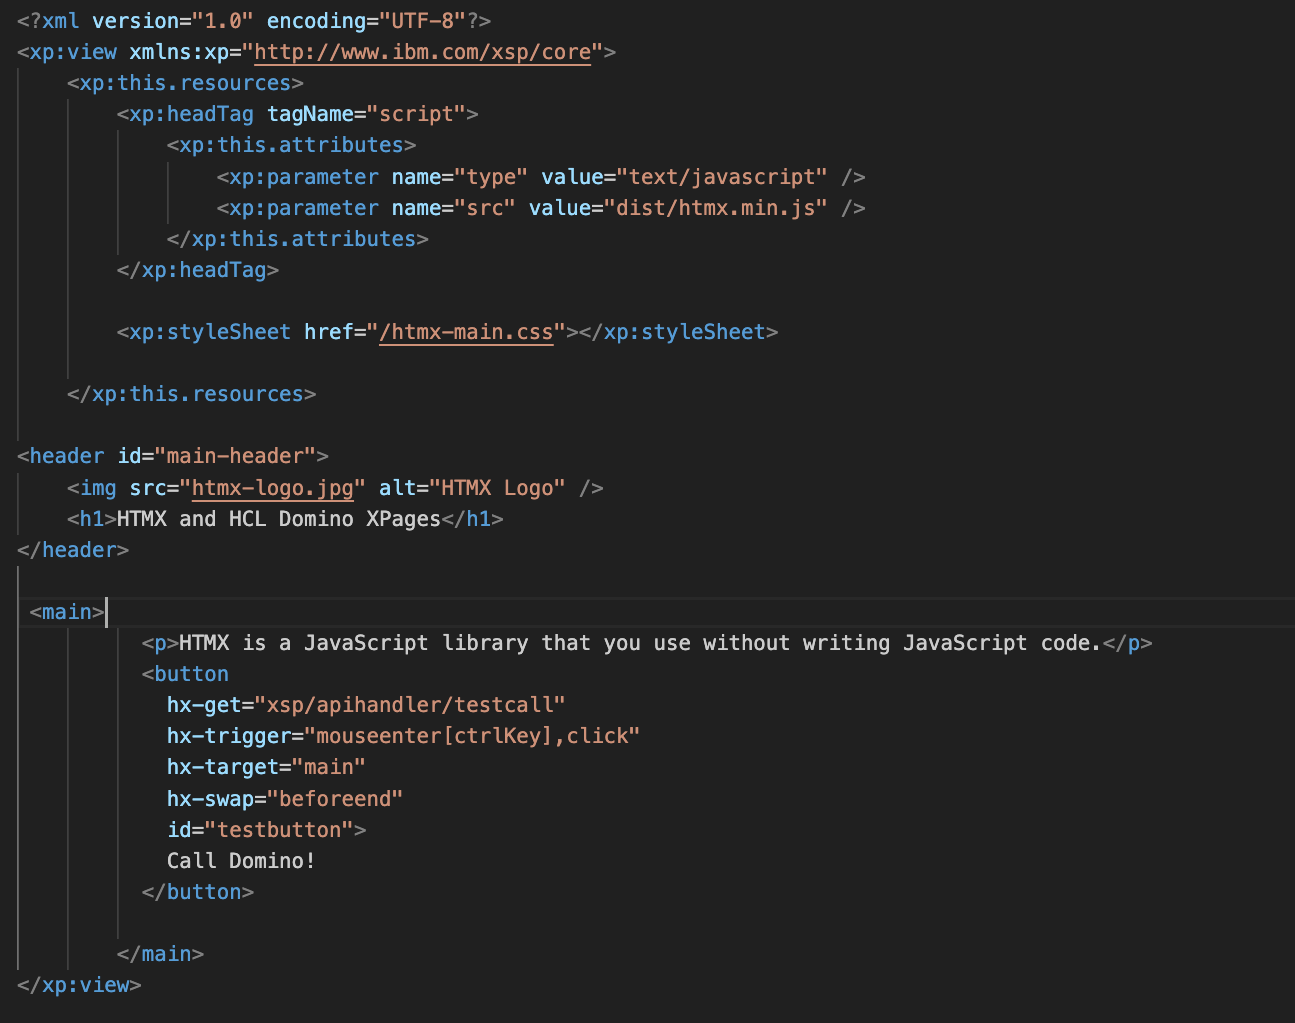
The button does not do anything yet, so let's add some HTMX magic and see what's happening:
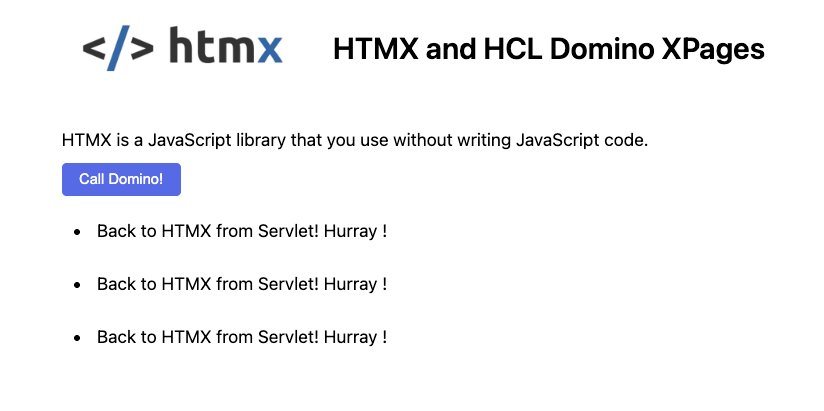
We added some HTMX tags to our button. If we compile the XPage now and click the button several times, we should see something ike this:
So what's happening here? Let's take a look at the button code step by step:
- hx-get="xsp/apihandler/testcall" - well, that's our endpoint in our servlet. hx-get indetifies a GET Request in HTMX.
- hx-trigger="mouseenter[ctrlKey],click" - defines that we can use the keyboard or a mouse click to fire the event that calls teh GET Request
- hx-target="main" defines the HTML Fragment, where the result should go.
- hx-swap="beforeend" means, the HTML that gets returned gets put in the innerHTML of the target before the respective end tag, in our case </main>
And that is our first GET call to our servlet in HTMX back to Domino! In the next chapter, I will go over some details of the HTMX Elements, Syntax and options for you to get a better understanding of what is possible and how.
See you then !
Link to part 1: https://heikos-blog.ghost.io/new-series-hcl-domino-web-development-with-htmx/
Link to part 2: https://heikos-blog.ghost.io/htmx-hcl-domino-part-2/
Link to part 3: https://heikos-blog.ghost.io/htmx-and-hcl-domino-part-3-classic-web-dev/